Sunday, December 14, 2025

gingerbread cookies

made use of the recipe from this site.  herein is my personal notation for future reference.

 ingredients:

  • 3.5 cups all-purpose flour (spooned/leveld)
  • 1 teaspoon baking soda
  • 1/2 teaspoon salt
  • 1 tablespoon ground ginger
  • 1 tablespoon ground cinnamon
  • 1/2 teaspoon ground allspice
  • 1/2 teaspoon ground cloves
  • 10 tablespoons unsalted butter (softened, room temp)
  • 3/4 cup packed brown sugar
  • 2/3 cup unsulphered/dark molasses (apparently Grandma's brand.  which was the only version in the grocery store anyway)
  • 1 egg (room tep)
  • 1 teaspoon vanilla extract 

preparation: 

  • in large bowl, whisk the flour, baking soda, salt, ginger, cinnamon, allspice, and cloves
  • in a large bowl, beat butter (hand mixer or whatever) for 1 min on medium until smooth/creamy
  • add the brown sugar and molasses and beat on medium high until combined/creamy
  • beat in egg and vanilla on high for 2 full minutes
  • add the dry ingredients and beat on low until combined (it will be thick/sticky)
  • divide dough in half and place each onto plastic wrap.  wrap tightly and create a disc and chill at least 3 hours (or overnight)
  • roll out disc until 1/4 inch thick
  • cut into shapes and place about 1 inch apart on baking sheets 
  • bake at 350°F on about 9 minutes for smaller cookies.  apparently 11 minutes for larger (4"+ cookies)
  • cool for 5 minutes on cookie sheet and then transfer to cooling rack 

 discussion:

9 minutes was about right for baking.  the consistency was soft on inside, a little crisp at edges.  overall nice.  probably would bump up the spices.  i couldn't find the meringue powder at publix, so i didn't do the homemade royal icing this time.  went with premade icing.  kids enjoyed the making and the eating.  and nat enjoyed the decorating so far.


Saturday, March 27, 2021

freddington update - 2021 edition

not a new recipe, but i do need to put my latest refinements and updates somewhere that i remember them.

 miniature freddingtons are better than a single long one.  it cooks more evenly and is easier to prepare.

  • i've taken to getting pre-cut filet mignon medallions (~1/2 lb each)
  • for three freddingtons, i used 1/2 apple, 1 medium-large eggplant, a little garlic, and two 5.2oz bags of pre-roasted chestnuts.  this provides enough duxelles without being too much or too little.
  • i use six pieces of proscuitto per freddington (three across, two long)
  • i use 2/3 of a puff pastry sheet, plus a little, for a freddington of this size
  • IMPORTANT: put cooking spray on the rack used for baking.  putting it on a wire rack, on a cookie sheet, with parchment paper helps with cleanup.
  • bake it until 115°f, and it'll keep cooking up to about 135, so it'll be on the verge of medium.  maaaaybe bring out a little earlier, even.

Friday, July 27, 2018

eggplant casserole redux

so one of the recipes i posted early on was a pork and eggplant casserole, and in recent years, i've inadvertently recreated it.  last summer, i was making what was supposed to be a ratatouille...but it turned out to be a better version of the initial casserole.  i neglected to document it then, but i made it again this month.  i actually remembered to photograph it this time!

all in all, this takes maybe 45 minutes to prepare and cook, and it made about 6 servings.


ingredients:
- 1 pound hot sausage (walker farms meat)
-1 eggplant (largeish
- 1 pint of frozen tomatoes (mostly drained)
- 1 medium fresh tomato (cut up)
- feta cheese
- basil
- oregano
- chili powder
- garlic powder
- onion powder
- cayenne
- salt
- black pepper

preparation:
i started by cubing up the eggplant.  i tossed it with a tablespoon or so of olive oil and included the various herbs and spices (to taste).

i browned the sausage in a large cast iron pan (on medium to medium-high heat).  once cooked, i added the eggplant to the pan and let that brown.  i stirred in the tomatoes and let the mixture cook on the stove until it started to bubble.  at this point, i popped the pan in the oven (350°F) for about 30-35 minutes.

serve in a bowl with feta cheese (about 2 oz per serving).


verdict:
this preparation solves the original problem i had with the recipe, which was with tough eggplant.  we both love it...there's a good heat to the dish fom the hot sausage (and spices), but it's not so much that the mouth is on fire for hours.  rather, it just helps clear the sinuses.

i was going to stash some in the freezer (just to have pre-made meals on hand), but jackie wouldn't let me...it got consumed within 4 days!  i guess i'll just have to procure more eggplant and make another serving for freezing.

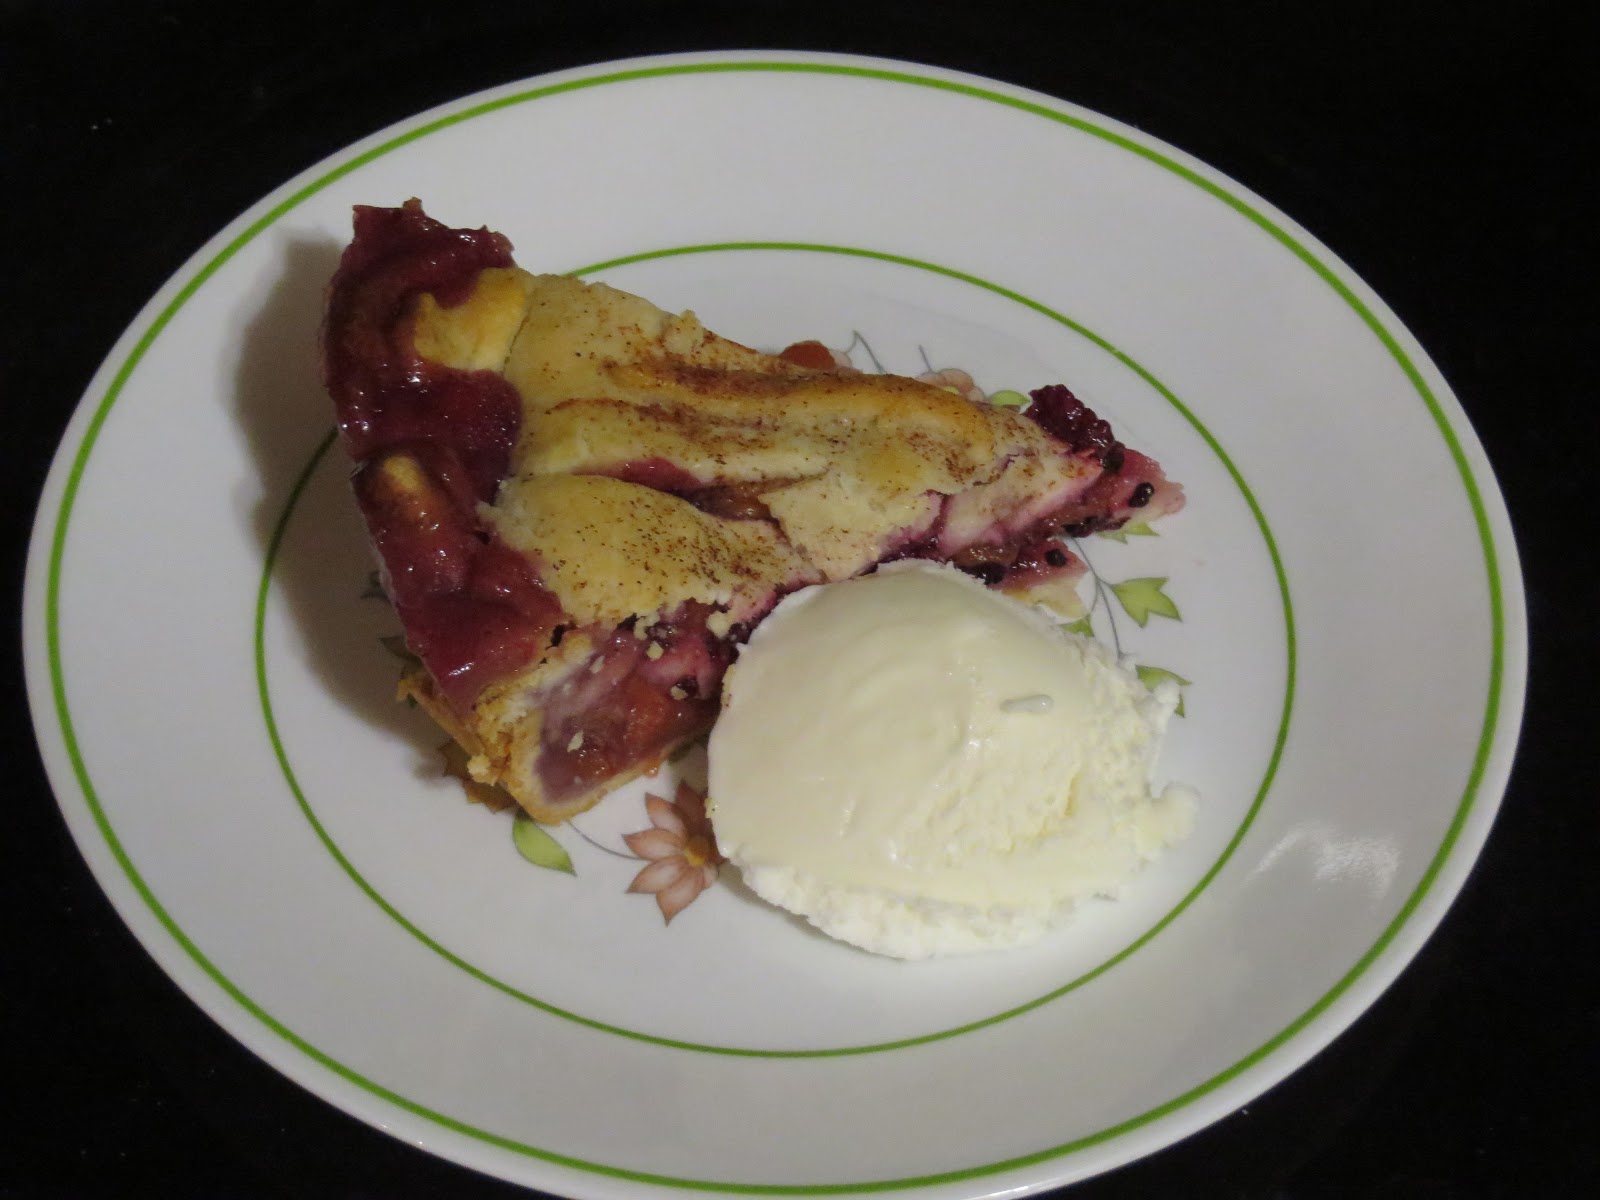
peach and blackberry pie

so over the july 4 holiday, my uncle asked why i never posted any recipes anymore.  and i didn't have a good answer.  being busy isn't an excuse because it isn't like i'm not cooking anything.  so i'm trying to make the effort to remember to take photographs and to document what i've been doing.  that said, i'm still being slow about it (this pie was baked back on july 9)...but at least i'm posting!

jackie found a recipe for this blackberry and peach pie online, and she wanted me to try it.  we had picked up some peaches from a roadside stand outside rockingham, nc, on our way back from the beach (frozen by now, of course), but we needed some berries.  so jackie came with me on her very first blackberry-picking expedition.  after the briars and the bugs and the heat, it might be that she'll leave the berry picking to me in the future, but she did good!


ingredients:
~ 2.5-3 cups fresh blackberries
~ 3 peaches, skinned/sliced/pitted
- 3 tablespoons cornstarch
- 3/4 cup sugar
- 2 tablespoons butter, melted
- 1 tablespoon cinnamon
- 1/2 tablespoon nutmeg
- double crust (premade)

preparation:
mix the berries, peaches, cornstarch, and sugar in a large bowl.  contrary to the online recipe, i also stirred the cinnamon and nutmeg into the mixture.

press one pie crust into the bottom of a pie pan.  pour the fruit mixture into the pan and cover with the second crust.  crimp the edges together to seal the pie.  cut slits in the pie for venting.  i got a little fancy and cut out a few ovals in addition to a few slits.  brush top of the pie with the melted butter.  i also sprinkled a little bit of white sugar and cinnamon on the crust.

put pie in oven (preheated to 450°F) for 15 minutes.  reduce heat to 350°F and bake until crust is golden brown.  for me, this took about 37 minutes.


verdict:
this is a good pie and pairs very nicely with vanilla ice cream.  one downside was the crust; it was cooked properly but just wasn't as flaky as, say, a pillsbury crust.  as an alternative, it would be a great cobbler filling.  i'll definitely make a version of it again!

Monday, December 18, 2017

Banana Pumpkin Bread

*Guest Entry*

4 ripe bananas (2.5c mashed)
1 pie pumpkin, roasted (yielded 3c mashed)
2 cup sugar
2/3 cup melted butter
4 eggs
4 cups plain flour
2 teaspoon baking soda
3 tsp cinnamon
2 tsp clove
1 tsp nutmeg
1 cup pecans, roughly chopped
2 pinches of salt (which I forgot to add so I added a couple grains to each mini loaf a couple minutes after popping them into the oven and stirred it in... let's hope for the best)
7 greased mini loaf pans (I tried out Baker's Joy for "greasing")

Preheat the oven to 300F.
Follow pumpkin puree recipe from October 2014. And allow to cool completely. (Brian prepared this two days before and put in the refrigerator.)
Combine the pumpkin and mashed bananas until homogeneous.
In a separate large bowl, combine the sugar, butter, and eggs, and stir until well mixed.
Add the fruit and vegetable mixture to the sugar, butter, egg mixture and mix well.
In a separate bowl, combine the dry ingredients (flour, baking soda, spices, and salt).
Slowly add the dry ingredients to the wet ingredients while constantly stirring.

At this point, the bread batter seemed to be somewhere between cake batter consistency and dough. I hope that's right!

I transferred a heaping cup of the mixture to 3 of the loaf pans and kept adding until there was about 1.5 centimeters of room to the top of the pan.
Then I added the chopped nuts to the remaining mixture and stirred.
I then repeated the same process into 3 new loaf pans, but then I had extra for a 4th, so I just filled that one up too.

It took 54 minutes in the oven to bake. (I checked in at 30 mins, 40 mins, 44 mins, 48 mins, 50 mins, one loaf passed the wooden toothpick test so I took them all out, but another one was a little wet, so I put them all back in and checked 4 minutes later at 54 mins). So it wasn't in a closed oven for 54 minutes straight, just FYI.


As for the verdict... it'll have to wait. These are Christmas presents for various people. Regardless of how successful they are, I'll be making a second batch this upcoming weekend for a second wave of Christmas presents. If I'm lucky, there will be an extra that I can have myself.


Tuesday, August 29, 2017

Pineapple Chicken with Cabbage Stir Fry


*GUEST ENTREE ENTRY*

Stir Fry Ingredients
2 tbsp wok oil
1 clove garlic, crushed
1 tsp raw ginger, crushed
1 tbsp soy sauce
6 cups shredded cabbage blend with carrots
1 red bell pepper, julienne slices
~9 hollow parts of green onions in 5-10mm diagonal cuts
Salt to season

Heat 1 tbsp of wok oil. Add garlic and ginger and stir until aromatic. Add red bell pepper and stir for a few minutes until somewhat softened. Add cabbage, 1 tbsp wok oil, and soy sauce. Stirring occasionally until cabbage starts to wilt. Add green onions and salt to season. Stir until preferred stir fry texture.

Fried Chicken Ingredients
1lb boneless, skinless chicken thighs, 1" cubes
2 eggs, beaten
1 cup flour
1 tsp ground pepper
1 tsp salt
1 pint reusable vegetable oil

Heat 1 pint of vegetable oil on medium-high heat (to what I would call "deep frying temperature"). Mix together flour, salt, and pepper in bread bag or Ziplock bag. Dunk chicken cubes in eggs. Then place wet chicken cubes into flour (~6-8 pieces at a time). Shake to coat and then place raw coated chicken on a plate. Continue until all the chicken is coated in flour. Drop 10-14 pieces of chicken in hot oil. Allow the pieces to turn light brown before flipping over (to keep the breading intact). Allow to cook through (like 5 minutes). Transfer out with a slotted spoon to another plate lined with paper towels to soak up the grease.

Pineapple Sauce Ingredients
1 cup water
1 tbsp soy sauce
1/2 cup pineapple white balsamic vinegar
Juice (only) from one can of 8oz Dole pineapple rings in juice
1 tsp raw ginger, crushed
2/3 cup brown sugar
1 tsp corn starch
2 cups pineapple chunked into small/medium bite-size pieces
Toasted sesame seeds

Bring water, soy sauce, vinegar, and juice to a simmer. Add ginger and continue to simmer until aromatic. Add brown sugar and continue to simmer. Add 1 tsp of corn starch and bring to a low boil for about 5 minutes. Reduce heat to check consistency (add more corn starch if desired). Add pineapple chunks to sauce on low heat. Add fried chicken as prepared above to sauce. I brought it back to a boil to burn off any extra water to thicken the sauce a little more without adding more corn starch. Then reduce. Sprinkle with sesame seeds.


Verdict

Since I couldn't find a recipe to follow/tweak, this was a true experiment. By combining previous techniques from my Clementine Chicken recipe and new ideas from reading through a bunch of recipes that just weren't what I was looking for, I have come up with something quite grand. Also, we picked up copious amounts of pineapple white balsamic vinegar and wok oil at Olive & Vinegar in Greenville a couple weekends ago; I was determined to do something with it. Overall, I am quite pleased with this meal. The sauce could have stood to be just a little thicker, but I'm always overly cautious of adding too much corn starch (because I have definitely ruined a meal or two by doing that). So, I was fine with it for how it turned out, especially after it cooled down. Also, I had no idea how long each of the 3 components were going to take to cook, so I started all 3 at the same time. The sauce and chicken took about the same time, but the cabbage stir fry could have waited at least 10 minutes after I started on the other two. By multitasking, I created a huge mess, but it was well worth it! 


Tuesday, April 4, 2017

Beet Pesto Spread

*GUEST ENTREE ENTRY*

Visit the Roasted Sweet Potato & Beet Salad blog entry for instructions on how to roast the beets for this...

3 red beets, roasted
6 cloves of garlic *recommend scaling this back to 3 cloves in the future*
3/4c walnuts, roasted (~7 minutes)
3/4c grana padana cheese, shredded
1/4c oil olive
zest of a lemon
juice of a lemon
1 tsp salt

Add the ingredients to a food processor and pulse several times until the ingredients are well combined. It should be a spreadable paste consistency (like hummus). Serve over crackers, toasted italian bread, on a sandwich, etc.


The texture of this was great... however, the garlic truly overpowered this spread. I would recommend using 1/2 the garlic or even 1 clove of garlic to 1 red beet. There was A LOT of this spread & unfortunately, it didn't all get used.

Paleo Crock Pot Chili Recipe

*GUEST ENTREE ENTRY*

I literally followed this recipe from http://www.paleonewbie.com/paleo-crockpot-chili-recipe/ but with a few SMALL variations in the ingredients. Other than that, I followed her instructions, so visit her website. But I'll still document my efforts... 

2 lbs. of ground sirloin
1 onion, diced
3 cloves of garlic, minced
1 red and 1 green bell pepper, both diced
1 cup of carrots, finely diced
1 cup of celery, diced
1 jalapeno, minced
(1) 28-ounce can of crushed or stewed tomatoes (from Bob's garden)
(1) 14-ounce can of diced tomatoes
(1) 15-ounce can of tomato sauce
3 Tbsp. of chili powder
1 Tbsp. of oregano
1 Tbsp. of basil
2 tsp. of cumin
1 tsp. of salt
1 tsp. pepper
1 tsp. onion powder
1/2 tsp. of cayenne
About 4 strips of cooked bacon, crumbled
1 or 2 avocados, diced

Browning stage... 


Chopping stage...
Mixing stage...

Eating stage...


Yes! This chili is SOOOO good! It has a super hearty feel without the beans. The vegetable blend in here works so well & the avocado on top helps balance out the heat (without the need for adding cheese/sour cream). Definitely worth repeating! 


Roasted Sweet Potato & Beet Salad

*GUEST ENTREE ENTRY*

Of late, I've had a fascination with beets... probably because I don't ever remember eating them as a child, so they are a "new" thing to me.

"They don't really taste like dirt. When your kids turn their noses up at beets, tell them it's not the soil that gives beets their earthy flavor—it's the geosmin. An organic compound produced by microbes in the soil, geosmin gives off a smell like freshly plowed earth or a field after a rainstorm." - http://grow.cals.wisc.edu/agriculture/five-things-everyone-shoud-know-about-beets

So beets taste like how a rainstorm smells... cool!

Anyway, I have done a ton with beets lately... I'll start with the one I am most proud of...

3 red beets (beetroot & greens)
1 large sweet potato
chardonnay garlic grapeseed oil
rosemary
salt
walnuts
creamy Boars Head feta cheese
cranberry pear white balsamic dressing
Optional: drop with grilled/roasted chicken breast

Preheat the oven to 400F.

Cut the beet stem/leaves off close enough to the beet to give yourself enough to grip. Scrub the beets and then wrap the wet beet in aluminum foil (I've been using parchment paper as a barrier between the foil and the beet... because aluminum foil has been getting bad press). Transfer to a cookie sheet and bake for like 50-60 minutes.

While the beets are cooking. Quickly prepare the sweet potato. Scrub the sweet potato and then cut into centimeter size cubes (leaving the skin on). Transfer to a bowl. Toss with some chardonnay garlic grapeseed oil, just enough to lightly coat each piece. Sprinkle in rosemary and salt (seasoning to your preference). Transfer the sweet potato cubes to a cookie sheet, spreading out so it's all one layer and not touching. Pop in the oven & every 10-15 minutes stir around/flip over the cubes. This will bake for about 45 minutes.

While the beets & sweet potatoes are roasting, prepare your beet greens. Separate the greens from the stem. Place the greens in a white bowl and run cool water over them, washing them thoroughly. Drain out the water and repeat until you only have clear water in the bowl. This may take several cycles. Then chop up the greens for the salad.

Once the beets are done and have cooled off to a temperature where you can handle them, put on some gloves! Take the beets out of the foil and literally peel the skin off with your fingers using light pressure. The skin will come right off. Then cut the beets into centimeter size cubes (similar to the sweet potato).

Assemble the salad. Greens, beets, sweet potatoes, walnuts, and cheese. Drizzle cranberry pear white balsamic dressing on top & enjoy! 


Chocolate Almond Butter Cups

*GUEST ENTREE ENTRY*

I wanted to make homemade peanut butter cups around the holidays to give out as gifts. As I was reading up on various recipes, I stumbled across one using almond butter and honey. This sounded very interesting to me so I gave it a try.

5 oz Toll House dark chocolate 53% morsels
3 oz Toll House milk chocolate morsels
1/2 cup natural almond butter
2 Tbsp. honey
1 Tbsp. powdered sugar
1/2 tsp. vanilla extract
1/4 tsp. fine grain salt
sea salt flakes for topping
assorted mini cupcake liners

Before you start in on the chocolate, combine the almond butter, honey, sugar, vanilla, and salt together. I believe I had to end up adding a little more confectionary sugar to get everything to stick together and "ball up". After that, break apart a teaspoon of the mixture and roll it in your palms until you have a small ball. Repeat until gone. I popped these into the fridge to keep their form while I prepared the chocolate.

Melt the chocolate in a double broiler (which is a bowl resting on top of a pot of simmering water). Stirring until smooth.

Place your liners on a cookie sheet. Spoon enough chocolate into the bottom of the liner to coat it along with some of the edges. Tilt and twist the liner around as to completely coat the bottom of the liner and the edges. Then place the mixture ball in the center of each of the chocolate lined liners. After that, spoon more chocolate over the ball as to completely cover it in chocolate. Once all the chocolate is spooned out, I lightly tapped the cookie sheet on the counter, using the vibrations to even out the chocolate on top. While the chocolate was still wet, I sprinkled the sea salt flakes for topping. Then pop it in the fridge to set.


I was amazed at how easy it is to make a homemade almond/peanut butter cup.  I handed them out as Christmas presents this year. Honestly it was so long ago, I cannot remember if the recipients liked them or not... but I did! 

Eggplant Dirty Rice

There's quite a backlog of recipes to enter... just because we haven't posted anything in a good while doesn't mean we haven't been on our culinary expedition. We've just been having too much fun to officially document our experiments. 

Eggplant Dirty Rice with Slow Cooked Chicken Thighs
*GUEST ENTREE ENTRY*

4 chicken thighs, bone-in, skinless, organic
1.5c chicken stock
salt and pepper to taste

Put the above ingredients in a Crockpot and cook for 6 hours on low.  At 5 hours in, pull chicken apart to let sit in the juices and discard bones & gristle.

1/4c canola oil
1/2 tbsp chardonnay garlic grapeseed oil
5 celery ribs, finely chopped
2 small/medium yellow onions, finely chopped
salt to season
2 small/medium Italian eggplants, cubed (3/4-in)
1 tbsp dried thyme
1/2 tsp black pepper
1/4 tsp crushed red pepper flakes
1/4 tsp cayenne
3 garlic cloves, diced
1 tbsp ketchup
1/4c soy sauce
1.5c jasmine rice
2.5c chicken broth

Preheat oven to 350F.

In a large sauté pan, heat canola oil until shimmering. Add celery, onion, and salt. Cover and cook over low heat until the onion is translucent, about 5 minutes. Uncover and cook over moderate heat until the vegetables are lightly browned, about 10 minutes.

Add the eggplant, thyme, peppers, and season with salt. Drizzle the grapeseed oil.  Cook over moderate heat until the eggplant is softened, about 8 minutes. Stir in the garlic and ketchup and cook for 1 minute. Add the soy sauce and mix well. Stir in rice and broth and bring to a boil.

Transfer to a lightly greased casserole pan, cover, and bake for 17 minutes, until the rice is just tender. Remove from the oven and let stand, covered, for 10 minutes. Fluff the rice and serve with the chicken.


(Is it even) Optional: Crumbled feta cheese (a must!)

[insert picture]

I absolutely love this recipe & have made it a few times now, but not recently so my immediate thoughts about this dish are gone with the wind.

Saturday, February 20, 2016

key lime pie

last week, i was at the grocery store and saw a cart of rewrapped produce.  there were bags and bags of limes, avocados, tomatoes, and other things, and it was all dirt cheap.  jackie's assumption (a good one, i think) was that it was remnants from super bowl sunday where they were trying to get rid of guacamole ingredients.

at any rate, $0.98 for a bag of about 15 key limes was too good a deal to pass up.  i decided it was time to attempt a key lime pie.  i made use of the joy of cooking for the recipe, which turns out to be surprisingly easy.

for this attempt, i did a two-pronged approach.  i was really only interested in making key lime tartlets (is that a good description of a mini-pie?), but i was willing to make a crust from scratch.  however, i also found some pre-made graham cracker crusts in two inch pie tins.  so i decided to do both.


ingredients:
- 14 oz can of sweetened condensed milk
- zest of about four limes
- about 1/2 cup lime juice (about 5 limes)
- four large egg yolks

- one cup graham cracker dust (about 5 oz of pre-dusted crackers)
- 1/2 stick butter

preparation:
for the crust, i pulverized the crackers in jackie's magic bullet.  in retrospect, though, it would've been far easier to put the crackers in a bag and simply use a rolling pin.  live and learn, i suppose.  i also threw a little nutmeg and cinnamon into the dust.  i melted the butter, mixed it into the dust, and formed the crust.  i spooned the mix into a pie pan and pressed it into a crust.  to set things, i baked the crust at 350°F for about ten minutes and let it cool before adding the filling.

for the filling, i mixed the milk, the lime juice/zest, and the egg yolks together and scooped it into the pie crusts.  with six tartlets and one regular pie, the regular pie didn't get a whole lot of filling (but that's okay).  the recipe book says to bake at 325°F until it looks set; given the smaller size of the tartlets and the thinness of the regular pie, it only took about 10 minutes to cook properly.

verdict:
i am very happy with this result.  there was a good amount of citrus flavor to the filling, and it was nicely creamy.  the premade tartlet crust was decent, and i was surprised (in a good way) with the homemade graham cracker crust.  even though it's annoying to get the crust properly spread out in the pan, i think i'll continue with that for larger pies.  i might even use a muffin tin to make mini pies in the future.

Sunday, December 20, 2015

Clementine Chicken

**Guest Entree Entry**

Clementine Chicken

I've been thinking I'd like to try to make some orange chicken (like the kind from an Asian restaurant... is there another kind? I'm not sure...).  Anyway, so investigating some recipes online to see where I'd need to start... we starting thinking about how we could "probably" substitute "this" for "that" and that all I'd really need to get was an orange... As I was about to head off to work today, saying, "Ok, I'll get an orange on my way home..." I eyed a bag of clementines I picked up last week!  Scratched the orange off the list and realized we had everything we needed to make "Orange Chicken" in the house already!  Sweet deal! 

Ingredients in the order of how they appear in the masterpiece

1.5c water
2 tbsp freshly squeezed clementines (2 clementines)
1/2c lemon juice
1/3c white vinegar
2.5 tbsp soy sauce
1/2c canola oil, heated to what I'd call "deep frying" temperature
1 tbsp grated clementine zest (3 clementines)
1c packed light brown sugar
1/2 tsp ground ginger powder
1/2 tsp freshly minced garlic (1 clove)
2 tbsp chopped yellow onion (1/2 medium)
1/4 tsp red pepper flakes
1.5 lbs boneless, skinless chicken breast (1" cubes)
2 eggs, beaten
1c all purpose flour
1/4 tsp salt
1/4 tsp pepper
2 tbsp corn starch

Instructions

In a sauce pan, add...
1.5c water
2 tbsp freshly squeezed clementines (2 clementines)
1/2c lemon juice
1/3c white vinegar
2.5 tbsp soy sauce
and bring to a simmer...

While that's heating up, get your deep dish cast-iron skillet prepared for the chicken...
1/2c canola oil, heated to what I'd call "deep frying" temperature

**Turn your stove vent on!**

Now, back to the sauce pan, add...
1 tbsp grated clementine zest (3 clementines)
1c packed light brown sugar
1/2 tsp ground ginger powder
1/2 tsp freshly minced garlic (1 clove)
2 tbsp chopped yellow onion (1/2 medium)
1/4 tsp red pepper flakes
...and bring to a boil for 2-4 minutes and then remove from heat...

Meanwhile... toss cubed chicken in beaten eggs...
1.5 lbs boneless, skinless chicken breast (1" cubes)
2 eggs, beaten
... set aside for a minute

Mix the following and then transfer into a bread bag or gallon sized ziplock bag
1c all purpose flour
1/4 tsp salt
1/4 tsp pepper

Now, add the chicken cubes to the flour, shake to allow for an even coat.  Place chicken on a plate in preparation for frying.  Get a second clean plate ready with 2 paper towels on it to soak up some of the grease from the fried chicken.

Add the floured chicken to the hot oil in the skillet. Allow for one side to lightly brown before flipping so that the breading stays intact.  Cook thoroughly.

While the chicken is cooking, bring the sauce pan and its ingredients back up to a simmer. Stir in...
2 tbsp corn starch
... and stir for about 5 more minutes (it will thicken).

Keep an eye on both pans.  Once the chicken is cooked through, move it to the toweled plate to soak up the grease.  Then add the chicken to the sauce pan to coat in the sauce.


Serve over rice and with vegetables!


It's absolutely delicious and the best part about the whole meal is that we had everything we needed to make it right in our pantry/refrigerator!  Definitely worth a repeat in the future!

Friday, November 6, 2015

hummingbird cake

it's been awhile since i've documented something, so it's about time i put something up.  especially considering i baked this hummingbird cake on october 19!

i had been wanting to try making a hummingbird cake for awhile, and i decided to go for it.  partially because i had some bananas that were getting brown and partially because i just felt like it.  the recipe was mostly based on the one found here, but i cheated on the frosting by using a store-bought can.


 ingredients:
- 3 cups all-purpose flour
- 1 teaspoon baking soda
- 1 teaspoon salt
- 2 cups sugar
- 1 teaspoon ground cinnamon
- 3 eggs
- 1 cup canola oil
- 1 1/2 teaspoons vanilla extract
- 1 (8-ounce) can pineapple, undrained
- 1 cup pecans
- 2 cups chopped bananas (i didn't measure as much as use two or three small ones)
- cream cheese frosting (i used pillsbury)
 
preparation:
combine the dry ingredients in a large bowl.  add eggs and oil until the dry ingredients are moistened.  stir in the vanilla, pineapple, bananas, and pecans.
 
split the batter between two round cake pans (greased and floured).  bake at 350°F until  browned and a toothpick comes out clean.  i think my pans are a little bigger than the ones the recipe recommended, so it took somewhere on the order of 30-35 minutes to bake.  cool in the pans on a wire rack for about 10 minutes, and then remove from the pans to cool completely.
 
once cool, spread the cream cheese frosting between the layers and then on the outside of the whole cake.  store in the refrigerator.


verdict:
i did a few things wrong on this.  first, i made the mistake of using the pineapple chunks instead of the crushed pineapple.  don't get me wrong, it worked out just fine, but it just wasn't spread around enough.  also, i may not have broken the pecans into small enough pieces.  but these were merely cosmetic issues.  overall, the cake was delicious!  though a little dry the day it was baked, storing it in the fridge seemed to prevent it from being completely dried out on subsequent days.  i would do it again!

Sunday, July 12, 2015

blackberry quick bread

there are blackberries growing along the greenway behind the house, and they are good ones, too!  which is quite convenient and beats doing what i did last summer - which was trekking alongside the road picking somewhat inferior berries.  this weekend, i spent a couple hours picking a gallon of blackberries.

i froze most of them, but i wanted to do something different with the cup or so i reserved.  i toyed with the notion of trying something i heard from my dad...apparently a gentleman told him that the best thing to do with blackberries was to stew them with some honey or sugar and serve them over buttered biscuits (and a slice of hoop cheese on top).  this sounds like a pie without the pie, and it certainly works for strawberry shortcake, so i could see it.  however, today, i decided to try a quickbread.


i'll admit that i took this recipe from something i found online.  i suppose the joy of cooking might have had something on quickbreads in general, but i didn't find anything specific to blackberries.  so i decided the internet would provide this time.

preparation is quick/easy and only takes about 10 minutes.  cooking takes about an hour, and then it takes a little time to cool before cutting in and enjoying.

ingredients:
- 2 cups flour (all-purpose)
- 1 cup brown sugar
- 2 teaspoons baking powder
- 1/2 teaspoon salt
- blackberries (i had maybe a cup and a half or so)
- 3/4 cup milk
- 2 eggs
- 1 teaspoon vanilla extract
- most of a stick of butter

preparation:
mix the flour, sugar, baking powder, and salt into a large bowl.  gently stir in the berries until well coated.

melt the butter in a separate bowl.  mix the eggs, milk, and vanilla with the butter, and incorporate into the dry mixture.  stir batter until fully mixed and add to a greased bread pan (i used a 4" x 9" pan).  bake at 350°F for about an hour, or until the loaf is golden brown and a toothpick stabbed into the top comes out clean.  let cool for about 10 minutes before removing from the pan.

verdict:
this particular recipe is less sweet than i was expecting.  considering how there was only a cup of sugar, i suppose this shouldn't be any real surprise, but it lacks that certain something.  after talking to mom, it could be improved upon by toasting a slice with cinnamon sugar -- or by applying (gasp!) blackberry jam and/or honey.  shawn suggests adding something savory -- like perhaps a goat cheese (which i could see).

nonetheless, the bread did cook through properly, and the berries did not burst, so it was a pretty loaf.  i might play with this in the future.

zucchini casserole

so this is rather belated, but i tried a recipe a few weeks ago that i'm finally getting around to documenting.  i had some zucchini lying around and wanted to do something with it.  my initial thought was to do something similar to the pork and aubergine casserole, but it turned into something a little different along the way.


 total prep/cook time is roughly 40 minutes, and there were maybe 4-5 servings.

ingredients:


- 18 oz mild italian sausage
- 1 large zucchini
- 24 oz jar of spicy tomato and basil sauce (i used a variety called "classico")
- bag of italian six cheese  blend.

preparation:
remove the sausage from the casing and brown over medium-high heat.  when mostly browned, add thinly sliced zucchini into the pan.  when tender, add the jar of sauce and simmer mixture for several minutes.

pour mixture into a baking dish and sprinkle the cheese evenly to the top.  cover with aluminum foil and bake at 350°F for about 25 minutes.  serve over rice (i used basmati).


verdict:
this was a strange dish.  there was a nice kick to it from the sausage and the spicy tomato sauce, but it wasn't overpowering.  served over rice as it was, it felt almost like an indian curry-type dish, but it was using italian flavors.  an odd combination.  overall, it was a little watery, and there wasn't any particular textural contrast to the dish.  if i could've gotten the cheese to crisp up a bit, that might've been a worthwhile addition.  possibly baking some cheese separately on a pan and adding it afterwards could work.  all told, though, the aubergine casserole was probably superior.

Sunday, April 19, 2015

home sweet home

so jackie and i finally moved into the house.  we had already eaten here (first meal in the house being breakfast cereal is kind of an odd choice, but whatever), but until now, we had not cooked anything.  after tonight, though, we have officially broken the stove in.  what did we eat, you may ask?

drumroll, please....

box macaroni and cheese!


yes, believe it or not, we had box mac and cheese...neon-colored cheese powder and all.  granted, we did toss in a handful of sundried tomatoes (extremely tasty, by the way) and serve it with a side of green beans, so it wasn't completely kid's dinner.

i'd eat it again!

Friday, April 10, 2015

chicken roll-up

jackie was very sad that i ate the rest of the pepper stuffing last night, so i promised to make dinner tonight to make up for it.  after pondering the options and scrounging some mismatched ingredients, i decided on chicken roll-ups.  that's a technical term.  trust me, though, when i say that they taste better than the descriptive name may imply.


this dish took maybe 20 minutes to prepare and about 30 minutes to cook.  served with green beans and corn on the cob.

ingredients:
- boneless chicken cutlets (i didn't pay attention to the weight)
- sundried tomatoes
- baby spinach
- bacon
- feta cheese (i used garlic & herb crumbles)
- lemon juice
- salt/pepper

preparation:
wilt the spinach in a pan (medium heat) with a little bacon fat.  add sundried tomatoes (i have a little jar with tomatoes and herbed oils) to the mix, and crumble in about three pieces of cooked bacon.  add a little black pepper and lemon juice, and stir until warm.  remove from heat.

pound out the chicken cutlets to make them thinner.  i will say that putting wax paper under and over the chicken makes it such that the mallet doesn't get all chickeny and contaminated.

spoon feta cheese and the spinach mixture onto each of the flattened cutlets.  roll up each cutlet and transfer to a greased pan.  put the seam on bottom so it doesn't unroll while cooking.  sprinkle with salt/pepper and more feeta, and spritz with a little lemon juice.

cover dish with foil and bake at 350°F for 20 minutes.  remove foil and bake for an additional 10 minutes or until chicken is cooked.


verdict:
this dish was amazing.  the chicken was tender, and the filling was on point.  the juice in the bottom of the pyrex was something i could just lick up!

as an improvement idea, though, i might need to pound the chicken out a little thinner.  it would make it easier to roll up.  further, if i were to serve this dish at a party or somesuch, i would definitely use the roll-up-in-saran-wrap method (a la freddington) to make a tight cylinder that wouldn't fall apart when cutting it.  jackie also speculated that capers would fit into the filling (and i think she may be on to something there).

will cook again!

Sunday, March 29, 2015

fried potato cakes

so last week, i saw a cooking show on tv where someone prepared fried potato cakes...and it looked intriguing.  later in the week, i saw a rosemary and white cheddar potato cake on a restaurant menu.  this reminded me that i thought the concept was interesting.  so i decided to attempt it on my own.  because why not?

tonight, i cooked some green beans, reheated some of jackie's pulled pork, and had some potato cakes on the side.


in this case, the potato cakes are merely a side, but i prepared them ahead of time.  prep time took about 45 minutes (of which only 10-15 are active for prep) and about 10 minutes of cooking.

ingredients:
- 1 lb redskin potatoes
- 1.5 tablespoons butter
- milk (maybe 1/8 of a cup)
- herbs/spices (dried rosemary, fresh thyme, garlic powder, salt/pepper)
- shredded cheese (i used italian six cheese blend)
- vegetable oil

preparation:
boil the potatoes ahead of the actual cooking time (taking about 30 minutes).  once cooked, drop the potatoes in a bowl and mash them with the butter and the splash of milk.  stir in the herbs.  once everything is blended, put it in the fridge for later.

when you're ready to cook, take the cheese out of the fridge and add the shredded cheese (i put in about 1/3 cup, but that really wasn't enough).  once the cheese is incorporated, form patties/cakes out of the potato mixture.  for my experiment, i made a total of seven cakes.  put the cakes back in the fridge until just before cooking.

add vegetable oil to the bottom of a frying pan (just enough to cover the bottom) and bring it up to a medium-high heat.  place the cakes in the pan and brown for about 1.5 minutes per side.  through trial and error, i learned to squish the cakes immediately after being placed in the pan.  this ensures they get properly flattened.  once browned, remove from the pan, place on a paper towel, and dust with some salt.


verdict:
overall, i am intrigued by this recipe.  the first couple cakes didn't work quite as well because i flipped them too soon; they thus did not brown and instead fell apart.  however, subsequent cakes turned out nicely brown/crispy on the exterior and soft/warm on the inside.

in principle, it was excellent.  however, i didn't use quite enough cheese, so that flavor profile wasn't as prominent as it could have been.  for future versions, i would need to use more cheese in the cakes (and possibly use something with more bite, like sharp cheddar).

beyond this, i see these cakes as being versatile options.  they could be used as a side dish, but they could also be made into a breakfast entree by incorporating bacon.  additionally, my lovely assistant (and chief taste tester) suggested that this could become something of a dessert by using mashed sweet potatoes, toasted nuts, and pie spices.  i could even see using cranberries or raisins in such a mixture.  certainly food for thought!

interestingly, this is the first time i've ever made homemade mashed potatoes.  admittedly, it wasn't a full-blown mashed potato recipe (which would require more milk and more thorough mashing), but i think i could manage to do that in the future.  good to know!

Wednesday, March 25, 2015

Mega Meatloaf

**GUEST ENTREE ENTRY**
Mega Meatloaf - my own concoction

So when I traditionally think of meatloaf, I don't have nice thoughts associated with it & cringe at the use of ketchup on dried out meat... GROSS!

This is the second time I have tried making meatloaf with my spin on it and both times have been a great success!  It's only taken me a few months to finally blog it though.

Ingredients
1 huge mixing bowl
1lb hot ground sausage
1lb lean ground beef
1 packet of McCormick Meatloaf Seasoning
1/4c Progresso Italian breadcrumbs
1/2c 2% milk
2 eggs
2 raw russet potatoes peeled and shredded
2c shredded carrots
1 medium yellow onion diced
1 oven safe baking bag

Roll up your sleeves and blend the two meats together.  Add the seasoning, breadcrumbs, milk, and eggs.  Add in shredded potatoes, carrots, and onion.  Keep mixing with your hands until it is fairly uniform.  It is going to be an extremely large loaf.  Transfer the meat/vegetable mixture into an oven safe baking bag.  Mold into the shape of a loaf.  Place in a Pyrex dish, loaf pan (if you can find one for this monster), or baking sheet.  Bake at 375F for 1 hour.  Enjoy!


Verdict:  It is probably the most delicious meatloaf I have ever had!  The hot sausage adds a nice kick to it & by baking it in a bag, it retains all of the moisture.  Oh and not to mention... it contains a starch & 2 vegetables inside of the loaf too, so it is a complete meal by itself!  Brian did insist on green beans; which went well with this too.