so over the july 4 holiday, my uncle asked why i never posted any recipes anymore. and i didn't have a good answer. being busy isn't an excuse because it isn't like i'm not cooking anything. so i'm trying to make the effort to remember to take photographs and to document what i've been doing. that said, i'm still being slow about it (this pie was baked back on july 9)...but at least i'm posting!
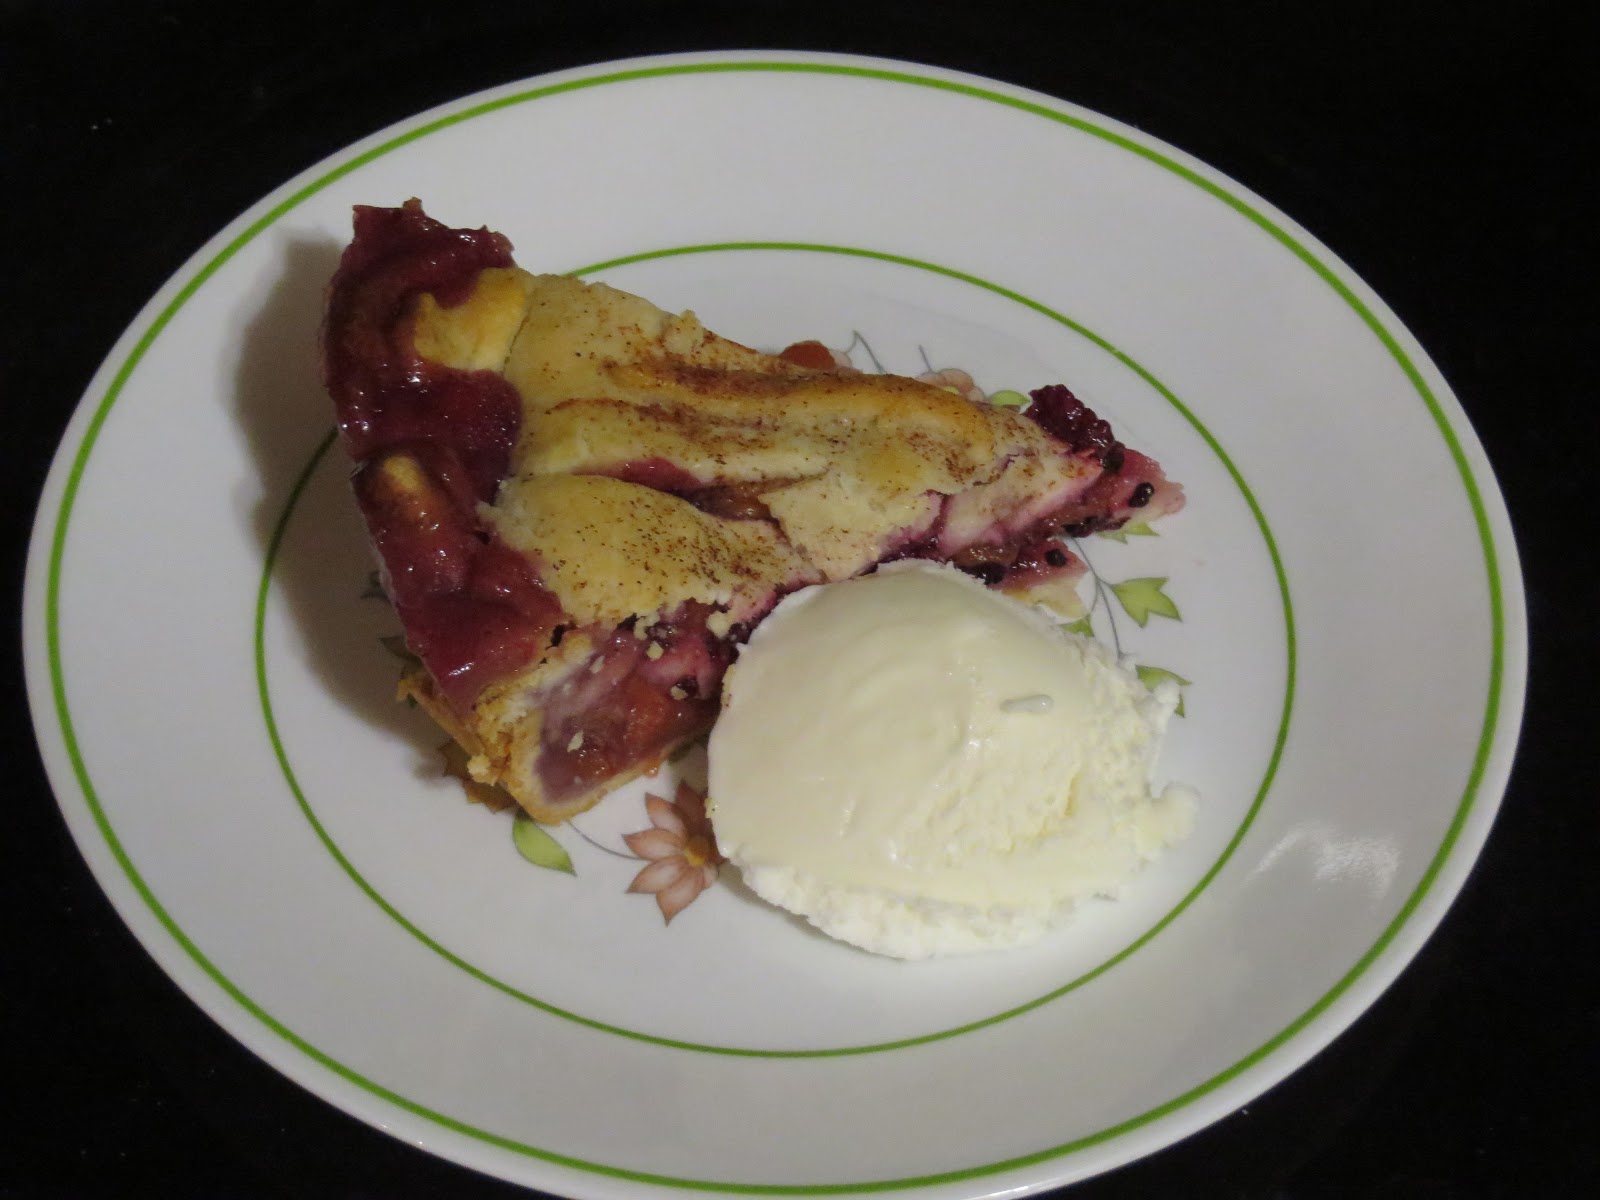
jackie found a recipe for this blackberry and peach pie online, and she wanted me to try it. we had picked up some peaches from a roadside stand outside rockingham, nc, on our way back from the beach (frozen by now, of course), but we needed some berries. so jackie came with me on her very first blackberry-picking expedition. after the briars and the bugs and the heat, it might be that she'll leave the berry picking to me in the future, but she did good!
ingredients:
~ 2.5-3 cups fresh blackberries
~ 3 peaches, skinned/sliced/pitted
- 3 tablespoons cornstarch
- 3/4 cup sugar
- 2 tablespoons butter, melted
- 1 tablespoon cinnamon
- 1/2 tablespoon nutmeg
- double crust (premade)
preparation:
mix the berries, peaches, cornstarch, and sugar in a large bowl. contrary to the online recipe, i also stirred the cinnamon and nutmeg into the mixture.
press one pie crust into the bottom of a pie pan. pour the fruit mixture into the pan and cover with the second crust. crimp the edges together to seal the pie. cut slits in the pie for venting. i got a little fancy and cut out a few ovals in addition to a few slits. brush top of the pie with the melted butter. i also sprinkled a little bit of white sugar and cinnamon on the crust.
put pie in oven (preheated to 450°F) for 15 minutes. reduce heat to 350°F and bake until crust is golden brown. for me, this took about 37 minutes.
verdict:
this is a good pie and pairs very nicely with vanilla ice cream. one downside was the crust; it was cooked properly but just wasn't as flaky as, say, a pillsbury crust. as an alternative, it would be a great cobbler filling. i'll definitely make a version of it again!
Showing posts with label dessert. Show all posts
Friday, July 27, 2018
Saturday, February 20, 2016
key lime pie
last week, i was at the grocery store and saw a cart of rewrapped produce. there were bags and bags of limes, avocados, tomatoes, and other things, and it was all dirt cheap. jackie's assumption (a good one, i think) was that it was remnants from super bowl sunday where they were trying to get rid of guacamole ingredients.
at any rate, $0.98 for a bag of about 15 key limes was too good a deal to pass up. i decided it was time to attempt a key lime pie. i made use of the joy of cooking for the recipe, which turns out to be surprisingly easy.
for this attempt, i did a two-pronged approach. i was really only interested in making key lime tartlets (is that a good description of a mini-pie?), but i was willing to make a crust from scratch. however, i also found some pre-made graham cracker crusts in two inch pie tins. so i decided to do both.

ingredients:
- 14 oz can of sweetened condensed milk
- zest of about four limes
- about 1/2 cup lime juice (about 5 limes)
- four large egg yolks
- one cup graham cracker dust (about 5 oz of pre-dusted crackers)
- 1/2 stick butter
preparation:
for the crust, i pulverized the crackers in jackie's magic bullet. in retrospect, though, it would've been far easier to put the crackers in a bag and simply use a rolling pin. live and learn, i suppose. i also threw a little nutmeg and cinnamon into the dust. i melted the butter, mixed it into the dust, and formed the crust. i spooned the mix into a pie pan and pressed it into a crust. to set things, i baked the crust at 350°F for about ten minutes and let it cool before adding the filling.
for the filling, i mixed the milk, the lime juice/zest, and the egg yolks together and scooped it into the pie crusts. with six tartlets and one regular pie, the regular pie didn't get a whole lot of filling (but that's okay). the recipe book says to bake at 325°F until it looks set; given the smaller size of the tartlets and the thinness of the regular pie, it only took about 10 minutes to cook properly.
verdict:
i am very happy with this result. there was a good amount of citrus flavor to the filling, and it was nicely creamy. the premade tartlet crust was decent, and i was surprised (in a good way) with the homemade graham cracker crust. even though it's annoying to get the crust properly spread out in the pan, i think i'll continue with that for larger pies. i might even use a muffin tin to make mini pies in the future.
at any rate, $0.98 for a bag of about 15 key limes was too good a deal to pass up. i decided it was time to attempt a key lime pie. i made use of the joy of cooking for the recipe, which turns out to be surprisingly easy.
for this attempt, i did a two-pronged approach. i was really only interested in making key lime tartlets (is that a good description of a mini-pie?), but i was willing to make a crust from scratch. however, i also found some pre-made graham cracker crusts in two inch pie tins. so i decided to do both.
ingredients:
- 14 oz can of sweetened condensed milk
- zest of about four limes
- about 1/2 cup lime juice (about 5 limes)
- four large egg yolks
- one cup graham cracker dust (about 5 oz of pre-dusted crackers)
- 1/2 stick butter
preparation:
for the crust, i pulverized the crackers in jackie's magic bullet. in retrospect, though, it would've been far easier to put the crackers in a bag and simply use a rolling pin. live and learn, i suppose. i also threw a little nutmeg and cinnamon into the dust. i melted the butter, mixed it into the dust, and formed the crust. i spooned the mix into a pie pan and pressed it into a crust. to set things, i baked the crust at 350°F for about ten minutes and let it cool before adding the filling.
for the filling, i mixed the milk, the lime juice/zest, and the egg yolks together and scooped it into the pie crusts. with six tartlets and one regular pie, the regular pie didn't get a whole lot of filling (but that's okay). the recipe book says to bake at 325°F until it looks set; given the smaller size of the tartlets and the thinness of the regular pie, it only took about 10 minutes to cook properly.
verdict:
i am very happy with this result. there was a good amount of citrus flavor to the filling, and it was nicely creamy. the premade tartlet crust was decent, and i was surprised (in a good way) with the homemade graham cracker crust. even though it's annoying to get the crust properly spread out in the pan, i think i'll continue with that for larger pies. i might even use a muffin tin to make mini pies in the future.
Friday, November 6, 2015
hummingbird cake
it's been awhile since i've documented something, so it's about time i put something up. especially considering i baked this hummingbird cake on october 19!
i had been wanting to try making a hummingbird cake for awhile, and i decided to go for it. partially because i had some bananas that were getting brown and partially because i just felt like it. the recipe was mostly based on the one found here, but i cheated on the frosting by using a store-bought can.
ingredients:
i had been wanting to try making a hummingbird cake for awhile, and i decided to go for it. partially because i had some bananas that were getting brown and partially because i just felt like it. the recipe was mostly based on the one found here, but i cheated on the frosting by using a store-bought can.
ingredients:
- 3 cups
all-purpose flour
- 1 teaspoon
baking soda
- 1 teaspoon
salt
- 2 cups
sugar
- 1 teaspoon
ground cinnamon
- 3 eggs
- 1 cup canola oil
- 1 1/2 teaspoons
vanilla extract
- 1
(8-ounce) can pineapple, undrained
- 1 cup pecans
- 2 cups
chopped bananas (i didn't measure as much as use two or three small ones)
- cream cheese frosting (i used pillsbury)
preparation:
combine the dry ingredients in a large bowl. add eggs and oil until the dry ingredients are moistened. stir in the vanilla, pineapple, bananas, and pecans.
split the batter between two round cake pans (greased and floured). bake at 350°F until browned and a toothpick comes out clean. i think my pans are a little bigger than the ones the recipe recommended, so it took somewhere on the order of 30-35 minutes to bake. cool in the pans on a wire rack for about 10 minutes, and then remove from the pans to cool completely.
once cool, spread the cream cheese frosting between the layers and then on the outside of the whole cake. store in the refrigerator.
verdict:
i did a few things wrong on this. first, i made the mistake of using the pineapple chunks instead of the crushed pineapple. don't get me wrong, it worked out just fine, but it just wasn't spread around enough. also, i may not have broken the pecans into small enough pieces. but these were merely cosmetic issues. overall, the cake was delicious! though a little dry the day it was baked, storing it in the fridge seemed to prevent it from being completely dried out on subsequent days. i would do it again!
Sunday, July 12, 2015
blackberry quick bread
there are blackberries growing along the greenway behind the house, and they are good ones, too! which is quite convenient and beats doing what i did last summer - which was trekking alongside the road picking somewhat inferior berries. this weekend, i spent a couple hours picking a gallon of blackberries.
i froze most of them, but i wanted to do something different with the cup or so i reserved. i toyed with the notion of trying something i heard from my dad...apparently a gentleman told him that the best thing to do with blackberries was to stew them with some honey or sugar and serve them over buttered biscuits (and a slice of hoop cheese on top). this sounds like a pie without the pie, and it certainly works for strawberry shortcake, so i could see it. however, today, i decided to try a quickbread.
i'll admit that i took this recipe from something i found online. i suppose the joy of cooking might have had something on quickbreads in general, but i didn't find anything specific to blackberries. so i decided the internet would provide this time.
preparation is quick/easy and only takes about 10 minutes. cooking takes about an hour, and then it takes a little time to cool before cutting in and enjoying.
ingredients:
- 2 cups flour (all-purpose)
- 1 cup brown sugar
- 2 teaspoons baking powder
- 1/2 teaspoon salt
- blackberries (i had maybe a cup and a half or so)
- 3/4 cup milk
- 2 eggs
- 1 teaspoon vanilla extract
- most of a stick of butter
preparation:
mix the flour, sugar, baking powder, and salt into a large bowl. gently stir in the berries until well coated.
melt the butter in a separate bowl. mix the eggs, milk, and vanilla with the butter, and incorporate into the dry mixture. stir batter until fully mixed and add to a greased bread pan (i used a 4" x 9" pan). bake at 350°F for about an hour, or until the loaf is golden brown and a toothpick stabbed into the top comes out clean. let cool for about 10 minutes before removing from the pan.
verdict:
this particular recipe is less sweet than i was expecting. considering how there was only a cup of sugar, i suppose this shouldn't be any real surprise, but it lacks that certain something. after talking to mom, it could be improved upon by toasting a slice with cinnamon sugar -- or by applying (gasp!) blackberry jam and/or honey. shawn suggests adding something savory -- like perhaps a goat cheese (which i could see).
nonetheless, the bread did cook through properly, and the berries did not burst, so it was a pretty loaf. i might play with this in the future.
i froze most of them, but i wanted to do something different with the cup or so i reserved. i toyed with the notion of trying something i heard from my dad...apparently a gentleman told him that the best thing to do with blackberries was to stew them with some honey or sugar and serve them over buttered biscuits (and a slice of hoop cheese on top). this sounds like a pie without the pie, and it certainly works for strawberry shortcake, so i could see it. however, today, i decided to try a quickbread.
i'll admit that i took this recipe from something i found online. i suppose the joy of cooking might have had something on quickbreads in general, but i didn't find anything specific to blackberries. so i decided the internet would provide this time.
preparation is quick/easy and only takes about 10 minutes. cooking takes about an hour, and then it takes a little time to cool before cutting in and enjoying.
ingredients:
- 2 cups flour (all-purpose)
- 1 cup brown sugar
- 2 teaspoons baking powder
- 1/2 teaspoon salt
- blackberries (i had maybe a cup and a half or so)
- 3/4 cup milk
- 2 eggs
- 1 teaspoon vanilla extract
- most of a stick of butter
preparation:
mix the flour, sugar, baking powder, and salt into a large bowl. gently stir in the berries until well coated.
melt the butter in a separate bowl. mix the eggs, milk, and vanilla with the butter, and incorporate into the dry mixture. stir batter until fully mixed and add to a greased bread pan (i used a 4" x 9" pan). bake at 350°F for about an hour, or until the loaf is golden brown and a toothpick stabbed into the top comes out clean. let cool for about 10 minutes before removing from the pan.
verdict:
this particular recipe is less sweet than i was expecting. considering how there was only a cup of sugar, i suppose this shouldn't be any real surprise, but it lacks that certain something. after talking to mom, it could be improved upon by toasting a slice with cinnamon sugar -- or by applying (gasp!) blackberry jam and/or honey. shawn suggests adding something savory -- like perhaps a goat cheese (which i could see).
nonetheless, the bread did cook through properly, and the berries did not burst, so it was a pretty loaf. i might play with this in the future.
Saturday, November 8, 2014
baked pineapple
pineapple is pretty much awesome. admittedly, it's not an apple, and it doesn't taste/smell like pine, but that's beside the point. and baking a pineapple should make it twice as awesome. especially if it's done to look like how (a surprisingly cheerful) gordon ramsay cooks it. which is to say that it's baked in a salt crust. for reference, the recipe is here.
unfortunately, i am not gordon ramsay. which means that my experiment was pretty much a failure. i'm not even bothering to photograph this disaster because, well, it kind of looked like a regular pinapple afterwards. i ended up just butchering the pineapple in a traditional fashion for later consumption.
part of the problem may be that i used a non-miniature pineapple. using a regular sized pineapple may have made it need to bake longer, which i didn't really do. a secondary problem may have been my salt-crusting technique. i don't think i made the salt mixture wet enough (not enough egg), so it didn't stick. very frustrating.
maybe i'll try it again...but not anytime soon, i don't think.
unfortunately, i am not gordon ramsay. which means that my experiment was pretty much a failure. i'm not even bothering to photograph this disaster because, well, it kind of looked like a regular pinapple afterwards. i ended up just butchering the pineapple in a traditional fashion for later consumption.
part of the problem may be that i used a non-miniature pineapple. using a regular sized pineapple may have made it need to bake longer, which i didn't really do. a secondary problem may have been my salt-crusting technique. i don't think i made the salt mixture wet enough (not enough egg), so it didn't stick. very frustrating.
maybe i'll try it again...but not anytime soon, i don't think.
Friday, April 18, 2014
banana pudding
i've recently been trying several of my mom's recipes for the first time. in this case, i followed up the banana bread with another banana recipe last weekend: banana pudding!
as far as banana puddings go, most seem to be confections full of whipped cream, and i'll admit that i'm not a fan...i'm much more partial to my mom's recipe. granted, my preference is probably related to the fact that this is what i grew up with...and that growing up with something means other versions aren't generally as good. but i'm okay with that.
when i was talking to my mom about it, she told me that she learned the pudding recipe during a microwave cooking class she took many moons ago. and she simply added bananas to it. simple and easy!
in fact, this only takes about 20 minutes (if that) to make. and it makes about 8 servings.
ingredients:
- 3/4 cup sugar
- 3 tablespoons corn starch
- pinch of salt
- 2 cups milk
- 3 egg yolks, slightly beaten
- 2 tablespoons butter or margarine
- 1 teaspoon vanilla
- vanilla wafers
- bananas (not overripe, about 4)
preparation:
combine the sugar, corn starch,, and salt in a two quart bowl. gradually stir in milk. microwave for 8 minutes (or until thickened) on medium high, interrupting thet cooking time twice to stir with a wire whisk. once thickened, stir a little of the hot mix into the egg yolks and then blend the warmed yolks into the hot mix. microwave 1-1.5 minutes on medium high or until the custard coats a metal spoon and stir well. stir in butter and vanilla until the butter melts.
while the pudding is cooling, layer whole vanilla wafers at the bottom of a large bowl (my mom always used a large, square corningware dish, but alas, i don't have one the correct size). the wafers should be all along the bottom and extend up the side (at least part of the way). slice bananas (as much as you prefer; i used about two), and layer the banana medallions on the wafers. spoon about half the pudding on top. add a layer of crushed vanilla wafers. add another layer of sliced bananas, the rest of the pudding, and more crushed wafers.
you can eat it warm or cold!
verdict:
when i was making the pudding itself, the mixture looked sort of lumpy. however, its ultimate consistency was fine (no lumps were noticed during taste testing), so i don't think i did anything wrong.
all in all, i was fairly pleased with how i made this pudding. it wasn't quite as perfect as my mom's, but then again, this was my first attempt. i also think that part of the problem was that i obtained reduced fat nilla wafers (they were on sale...). these particular wafers weren't as brittle as i remembered regular nilla wafers; instead of breaking easily/cleanly, they were rather too crunchy. this tends to make the warm pudding a little less enjoyable because you end up with a whole wafer in your mouth since the spoon/fork won't break the cookie in half.
when cold, however, it works just fine. fresh out of the fridge, the cookies are adequately softened. yum!
i wonder whether mixing in pulverized banana chips would be a worthwhile experiment...?
as far as banana puddings go, most seem to be confections full of whipped cream, and i'll admit that i'm not a fan...i'm much more partial to my mom's recipe. granted, my preference is probably related to the fact that this is what i grew up with...and that growing up with something means other versions aren't generally as good. but i'm okay with that.
when i was talking to my mom about it, she told me that she learned the pudding recipe during a microwave cooking class she took many moons ago. and she simply added bananas to it. simple and easy!
in fact, this only takes about 20 minutes (if that) to make. and it makes about 8 servings.
ingredients:
- 3/4 cup sugar
- 3 tablespoons corn starch
- pinch of salt
- 2 cups milk
- 3 egg yolks, slightly beaten
- 2 tablespoons butter or margarine
- 1 teaspoon vanilla
- vanilla wafers
- bananas (not overripe, about 4)
preparation:
combine the sugar, corn starch,, and salt in a two quart bowl. gradually stir in milk. microwave for 8 minutes (or until thickened) on medium high, interrupting thet cooking time twice to stir with a wire whisk. once thickened, stir a little of the hot mix into the egg yolks and then blend the warmed yolks into the hot mix. microwave 1-1.5 minutes on medium high or until the custard coats a metal spoon and stir well. stir in butter and vanilla until the butter melts.
while the pudding is cooling, layer whole vanilla wafers at the bottom of a large bowl (my mom always used a large, square corningware dish, but alas, i don't have one the correct size). the wafers should be all along the bottom and extend up the side (at least part of the way). slice bananas (as much as you prefer; i used about two), and layer the banana medallions on the wafers. spoon about half the pudding on top. add a layer of crushed vanilla wafers. add another layer of sliced bananas, the rest of the pudding, and more crushed wafers.
you can eat it warm or cold!
verdict:
when i was making the pudding itself, the mixture looked sort of lumpy. however, its ultimate consistency was fine (no lumps were noticed during taste testing), so i don't think i did anything wrong.
all in all, i was fairly pleased with how i made this pudding. it wasn't quite as perfect as my mom's, but then again, this was my first attempt. i also think that part of the problem was that i obtained reduced fat nilla wafers (they were on sale...). these particular wafers weren't as brittle as i remembered regular nilla wafers; instead of breaking easily/cleanly, they were rather too crunchy. this tends to make the warm pudding a little less enjoyable because you end up with a whole wafer in your mouth since the spoon/fork won't break the cookie in half.
when cold, however, it works just fine. fresh out of the fridge, the cookies are adequately softened. yum!
i wonder whether mixing in pulverized banana chips would be a worthwhile experiment...?
Sunday, September 15, 2013
sour cream apple pie
as a kid, i attended camp broadstone, a summer camp associated with appalachian state university, that is now (sadly) closed. one of the desserts that the kitchen staff made at least once every session was sour cream apple pie. the first time i tried it, i was astonished with how good it was...so light and fluffy.
a few years ago, i decided to replicate a version of this pie. after researching the internet, i found two recipes that looked interesting: one for a topping and one for the filling. naturally, i smashed the two recipes together into a single brilliant combination. yes, i'm very modest about my success.
as desserts go, this is one with a longer than average prep time. truthfully, it probably takes upwards of 45 minutes or more to prepare. but i rather think that the time is worth it. i generally end up cutting the pie into eighths, so it lasts...well, considerably less than eight days.
ingredients:
(crumble topping)
- 1/2 cup brown sugar
- 1/3 cup flour
- 1/4 cup butter/margarine
- 1 teaspoon cinnamon
- pinch of salt
(filling)
- 1 1/3 cup sour cream
- 2/3 cup white sugar
- 1/4 teaspoon salt
- dash of cinnamon
- 2 teaspoons vanilla
- 2 eggs
- 3 tablespoons flour
- 5-6 cups sliced apples (i used granny smith)
- shelled pecans
preparation:
first, blend all the crumble topping ingredients together in a bowl, cover, and chill. ideally, this would be done the day before you make the pie so that it can firm up overnight in the refrigerator. however, in a pinch, just stick it in the freezer for a half-hour before you start the rest of the pie filling.
for the pie filling, peel, core, and thinly slice several apples. i've learned that a potato peeler is an excellent tool for peeling apples, and then it's just a matter of slicing them up. in order to get 5-6 cups, i used four medium-sized apples. i used granny smith because it's a good pie apple (holds up well during baking) and because there weren't any pink lady apples in the grocery store. sadness.
whisk the sour cream, sugar, salt, vanilla, eggs, and flour (and a dusting of cinnamon) until smooth. since i've noticed an improvement in my omelets when i incorporate some air into the mixture with the whisk, i tried to do the same with this pie filling. add a double handful of shelled pecans (i didn't try to measure them) and the apples, and stir until all the apples are well-coated.
spoon the filling into a pie crust (i'll admit that i cheated and used a pre-made refrigerated crust). i didn't try to arrange the apple slices, but i did at least try to ensure that they were in layers (not just haphazardly poured into the pan).
take the topping mixture and crumble it evenly onto the pie filling. it should be enough to fully cover the exposed apple mixture. bake at 350°F for 1 hour 10 minutes. testing doneness with a toothpick should find the apples tender and the toothpick coming out clean.
let pie cool before serving.
verdict:
it's been awhile since i've baked it, so i had forgotten how much i enjoy this pie. i love how sour cream gets all light and fluffy when baked (even if i don't like sour cream in general), but i probably could have cooked the pie about 10 minutes more to get the filling to set just a little more.
five cups of apples almost looks like it is insufficient in the pan, but i think it's actually just about perfect; the pie filling lifts up when baking, and if any more apples were added, i think that filling would start spilling over the edge (and onto the bottom of the oven). normally, i try to add a cookie sheet under the pan to catch drips, but i forgot to do that this time...so it's just as well i didn't have excessive filling.
aside from that, i didn't add enough pecans. in the future, i probably should add a few to the top of the apples (before adding the brown sugar crumble). i've added nuts to the very top before, but those end up getting blackened because there's no coating to prevent them from burning...i suspect that putting a layer of pecans under the brown sugar would allow the topping to coat the nuts and toast them (without burning).
a few years ago, i decided to replicate a version of this pie. after researching the internet, i found two recipes that looked interesting: one for a topping and one for the filling. naturally, i smashed the two recipes together into a single brilliant combination. yes, i'm very modest about my success.
as desserts go, this is one with a longer than average prep time. truthfully, it probably takes upwards of 45 minutes or more to prepare. but i rather think that the time is worth it. i generally end up cutting the pie into eighths, so it lasts...well, considerably less than eight days.
ingredients:
(crumble topping)
- 1/2 cup brown sugar
- 1/3 cup flour
- 1/4 cup butter/margarine
- 1 teaspoon cinnamon
- pinch of salt
(filling)
- 1 1/3 cup sour cream
- 2/3 cup white sugar
- 1/4 teaspoon salt
- dash of cinnamon
- 2 teaspoons vanilla
- 2 eggs
- 3 tablespoons flour
- 5-6 cups sliced apples (i used granny smith)
- shelled pecans
preparation:
first, blend all the crumble topping ingredients together in a bowl, cover, and chill. ideally, this would be done the day before you make the pie so that it can firm up overnight in the refrigerator. however, in a pinch, just stick it in the freezer for a half-hour before you start the rest of the pie filling.
for the pie filling, peel, core, and thinly slice several apples. i've learned that a potato peeler is an excellent tool for peeling apples, and then it's just a matter of slicing them up. in order to get 5-6 cups, i used four medium-sized apples. i used granny smith because it's a good pie apple (holds up well during baking) and because there weren't any pink lady apples in the grocery store. sadness.
whisk the sour cream, sugar, salt, vanilla, eggs, and flour (and a dusting of cinnamon) until smooth. since i've noticed an improvement in my omelets when i incorporate some air into the mixture with the whisk, i tried to do the same with this pie filling. add a double handful of shelled pecans (i didn't try to measure them) and the apples, and stir until all the apples are well-coated.
spoon the filling into a pie crust (i'll admit that i cheated and used a pre-made refrigerated crust). i didn't try to arrange the apple slices, but i did at least try to ensure that they were in layers (not just haphazardly poured into the pan).
take the topping mixture and crumble it evenly onto the pie filling. it should be enough to fully cover the exposed apple mixture. bake at 350°F for 1 hour 10 minutes. testing doneness with a toothpick should find the apples tender and the toothpick coming out clean.
let pie cool before serving.
verdict:
it's been awhile since i've baked it, so i had forgotten how much i enjoy this pie. i love how sour cream gets all light and fluffy when baked (even if i don't like sour cream in general), but i probably could have cooked the pie about 10 minutes more to get the filling to set just a little more.
five cups of apples almost looks like it is insufficient in the pan, but i think it's actually just about perfect; the pie filling lifts up when baking, and if any more apples were added, i think that filling would start spilling over the edge (and onto the bottom of the oven). normally, i try to add a cookie sheet under the pan to catch drips, but i forgot to do that this time...so it's just as well i didn't have excessive filling.
aside from that, i didn't add enough pecans. in the future, i probably should add a few to the top of the apples (before adding the brown sugar crumble). i've added nuts to the very top before, but those end up getting blackened because there's no coating to prevent them from burning...i suspect that putting a layer of pecans under the brown sugar would allow the topping to coat the nuts and toast them (without burning).
Tuesday, September 10, 2013
fresh peach cake
two things occur to me tonight: first, i have been making a lot of desserts lately. and secondly, i have failed to document this peach cake recipe. with the help of some fruit (sadly obtained from the grocery store...peach season is basically over), i am rectifying the latter by continuing the tradition of the former.
i obtained this particular recipe from my mother, and the sheet of paper states that it is from august 1997. i don't know where she obtained it, but it's been a favorite summer dessert for years.
ingredients:
(cake batter)
- 1 1/4 cup light brown sugar
- 1/2 cup butter/margarine
- 2 eggs
- 1 cup buttermilk (i use the powdered buttermilk instead of buying the regular liquid...it lasts forever and i don't end up with a bunch of leftover buttermilk at the end of the recipe)
- 2 cup plain flour
- 1 teaspoon baking soda
- 1 teaspoon vanilla
- 1 teaspoon cinnamon
- pinch of salt
- 2 cups chopped peaches (can substitute blueberries, strawberries, or rhubarb)
(topping)
- 1 cup light brown sugar
- 1/2 stick butter/margarine
- 1/4 cup milk
preparation:
in a fairly large mixing bowl, cream the sugar and butter; add the eggs and the vanilla. in a separate container, sift the flour with the baking soda, salt, and cinnamon. add the dry ingredients to the creamed mixture alternately with buttermilk, and stir until the batter is thoroughly mixed. add the chopped peaches and stir until well coated.
pour the cake batter into a greased 9" x 13" pan. bake at 300°F for approximately 50 minutes, or until the cake is browned. a toothpick should come out clean, and the batter should be set (ie, not still liquidish. yes, that's a technical term).
to prepare the topping, boil the ingredients together for 3 minutes and pour over the cake while it is still hot from the oven. note: do not stir the mixture while it's boiling...it won't crystallize nearly so nicely if you do. also, if you judiciously perforate the top of the cake with the toothpick before adding the topping, the sugar will be better able to penetrate. or maybe it just seems that way. i'm not quite certain.
if desired, serve the cake with whipped cream or cool whip. sprinkle a little extra cinnamon on top. i don't much care for the whipped cream, but some people do. and some of those people will even try to convince you to give them allllll the cake!
verdict:
it goes without saying that this is a wonderful dessert. it probably also goes without saying that moms always make recipes better. still, i'm quite pleased with how well i can make this cake turn out.
i obtained this particular recipe from my mother, and the sheet of paper states that it is from august 1997. i don't know where she obtained it, but it's been a favorite summer dessert for years.
ingredients:
(cake batter)
- 1 1/4 cup light brown sugar
- 1/2 cup butter/margarine
- 2 eggs
- 1 cup buttermilk (i use the powdered buttermilk instead of buying the regular liquid...it lasts forever and i don't end up with a bunch of leftover buttermilk at the end of the recipe)
- 2 cup plain flour
- 1 teaspoon baking soda
- 1 teaspoon vanilla
- 1 teaspoon cinnamon
- pinch of salt
- 2 cups chopped peaches (can substitute blueberries, strawberries, or rhubarb)
(topping)
- 1 cup light brown sugar
- 1/2 stick butter/margarine
- 1/4 cup milk
preparation:
in a fairly large mixing bowl, cream the sugar and butter; add the eggs and the vanilla. in a separate container, sift the flour with the baking soda, salt, and cinnamon. add the dry ingredients to the creamed mixture alternately with buttermilk, and stir until the batter is thoroughly mixed. add the chopped peaches and stir until well coated.
pour the cake batter into a greased 9" x 13" pan. bake at 300°F for approximately 50 minutes, or until the cake is browned. a toothpick should come out clean, and the batter should be set (ie, not still liquidish. yes, that's a technical term).
to prepare the topping, boil the ingredients together for 3 minutes and pour over the cake while it is still hot from the oven. note: do not stir the mixture while it's boiling...it won't crystallize nearly so nicely if you do. also, if you judiciously perforate the top of the cake with the toothpick before adding the topping, the sugar will be better able to penetrate. or maybe it just seems that way. i'm not quite certain.
if desired, serve the cake with whipped cream or cool whip. sprinkle a little extra cinnamon on top. i don't much care for the whipped cream, but some people do. and some of those people will even try to convince you to give them allllll the cake!
verdict:
it goes without saying that this is a wonderful dessert. it probably also goes without saying that moms always make recipes better. still, i'm quite pleased with how well i can make this cake turn out.
Saturday, September 7, 2013
bacon-wrapped apples
so i went to the georgia aquarium over the labor day weekend, and i got up close and personal with a sea otter named cruz. which was awesome! this animal interaction is well worth it if you're ever in atlanta.
you may wonder why i preface a recipe with a plug for an aquarium exhibit, but i have a very good reason.
during the encounter, we were given the opportunity to stuff otter toys with raw seafood (shrimp, clams, and octopus). sounds fishy, you say? well, maybe. but it was still fun. anyway, one of the people participating in the encounter was stuffing a round, red toy. she was commenting that it looked like an apple, and one of the otter keepers thought she said "bacon wrapped apple." the keeper thought that sounded really weird...but also kind of delicious. and i happen to agree.
so i decided to make a version of bacon-wrapped apples.
ingredients:
- 2 apples (i used gala)
- 1 package bacon (i used a package of butcher's cut)
- cinnamon
- honey
preparation:
the apples i used were nc gala (it is apple season in the carolinas, after all), but they happened to be fairly small. so i quartered them and removed the core/seeds. i wrapped the quarters in bacon, dusted them in cinnamon, drizzled a little honey on top, and secured the whole mess with toothpicks.
put parchment paper on a baking sheet, and load up the apples. bake at 425°F for 20 minutes (or until the bacon is brown and crisped. remove from oven and place on newspaper/paper towels to drain and cool.
verdict:
in hindsight, i should've used some bacon that wasn't nearly as thick...the butcher's cut didn't want to wrap quite as nicely, and frankly, it took a lot longer than i expected to cook. i ended up having to zap the apples just a little longer in the microwave to finish cooking the bacon. also, i think maybe i should've added the cinnamon and honey to the apples before applying the wrappers.
all told, i think it's an interesting combination. i'd try it again, but i'd definitely tweak the recipe next time.
you may wonder why i preface a recipe with a plug for an aquarium exhibit, but i have a very good reason.
during the encounter, we were given the opportunity to stuff otter toys with raw seafood (shrimp, clams, and octopus). sounds fishy, you say? well, maybe. but it was still fun. anyway, one of the people participating in the encounter was stuffing a round, red toy. she was commenting that it looked like an apple, and one of the otter keepers thought she said "bacon wrapped apple." the keeper thought that sounded really weird...but also kind of delicious. and i happen to agree.
so i decided to make a version of bacon-wrapped apples.
ingredients:
- 2 apples (i used gala)
- 1 package bacon (i used a package of butcher's cut)
- cinnamon
- honey
preparation:
the apples i used were nc gala (it is apple season in the carolinas, after all), but they happened to be fairly small. so i quartered them and removed the core/seeds. i wrapped the quarters in bacon, dusted them in cinnamon, drizzled a little honey on top, and secured the whole mess with toothpicks.
put parchment paper on a baking sheet, and load up the apples. bake at 425°F for 20 minutes (or until the bacon is brown and crisped. remove from oven and place on newspaper/paper towels to drain and cool.
verdict:
in hindsight, i should've used some bacon that wasn't nearly as thick...the butcher's cut didn't want to wrap quite as nicely, and frankly, it took a lot longer than i expected to cook. i ended up having to zap the apples just a little longer in the microwave to finish cooking the bacon. also, i think maybe i should've added the cinnamon and honey to the apples before applying the wrappers.
all told, i think it's an interesting combination. i'd try it again, but i'd definitely tweak the recipe next time.
Monday, August 26, 2013
blackberry cobbler
i decided it was time to make myself a blackberry cobbler. the recipe is the same as what i used earlier this year...except this time i didn't use strawberries.
the real difference, though, is that i used less margarine (about 3/4 a stick instead of a whole one), and i also used self-rising flour (as per my mother's original recipe).
i think that using self-rising flour made the biggest difference. instead of the cobbler being kind of gluey, the crust actually tasted like crust is supposed to be. on the other hand, i still didn't use enough fruit; i probably could have doubled the amount of berries or halved the crust mixture. learning experiences, i suppose.
my own opinion is that the cobbler tasted liked blackberry cobbler ought...but other people were of the opinion that i should have added more sugar. tough cookies, i say!
the real difference, though, is that i used less margarine (about 3/4 a stick instead of a whole one), and i also used self-rising flour (as per my mother's original recipe).
i think that using self-rising flour made the biggest difference. instead of the cobbler being kind of gluey, the crust actually tasted like crust is supposed to be. on the other hand, i still didn't use enough fruit; i probably could have doubled the amount of berries or halved the crust mixture. learning experiences, i suppose.
my own opinion is that the cobbler tasted liked blackberry cobbler ought...but other people were of the opinion that i should have added more sugar. tough cookies, i say!
Sunday, March 24, 2013
blackberry & strawberry cobbler
i've been wanting to make a cobbler for awhile, but i kept forgetting to take the blackberries out of the freezer. yesterday, however, i finally remembered to put a quart bag of berries in the fridge to thaw. and then the strawberries in the grocery store actually smelled good, so i decided to make a mixed cobbler. an experiment, if you will.
ingredients:
- 1 quart blackberries (thawed)
- about 3/4 pound strawberries
- 1.5 cups sugar
- 1 cup flour
- 3 tbsp flour
- 2 tsp cinnamon
- 1 cup milk
- 1 stick margarine
preparation:
mix the berries (coarsely chop the strawberries) with about 1/2 cup of sugar and 3 tbsp flour and set aside. in a separate bowl, mix 1 cup sugar, 1 cup flour, and 2 tsp cinnamon. preheat the oven to 350°F, and melt the margarine in a 9x13 pan.
when the margarine is melted, remove pan from the oven and pour in the berries. take the other bowl and whisk in the milk. once mixed, pour over the berries. bake cobbler at the 350°F for about 1 hour and 5 minutes. the crust should be light brown and not gooey, and the fruit shouldn't be overly runny.
in my opinion, it's best if it cools for at least a little while before serving.
verdict:
mom's recipe does call for self-rising flour in the crust, but i didn't have any. and since i don't spend a whole lot of time baking things, i figured i'd make do with the all-purpose version. and although recipe also calls for a whole stick of margarine, i think that's pretty much overkill. next time i think i'll cut back to 3/4 stick and see how that works.
also, i may have used less fruit than i should have. from what i recall, the cobbler is a lot deeper when mom made it. overall, though, i think the mixed berries works fairly well. i can't quite discern the strawberries, but the cobbler is a little less tart than if only blackberries are used. which counts as a successful experiment, in my book.
ingredients:
- 1 quart blackberries (thawed)
- about 3/4 pound strawberries
- 1.5 cups sugar
- 1 cup flour
- 3 tbsp flour
- 2 tsp cinnamon
- 1 cup milk
- 1 stick margarine
preparation:
mix the berries (coarsely chop the strawberries) with about 1/2 cup of sugar and 3 tbsp flour and set aside. in a separate bowl, mix 1 cup sugar, 1 cup flour, and 2 tsp cinnamon. preheat the oven to 350°F, and melt the margarine in a 9x13 pan.
when the margarine is melted, remove pan from the oven and pour in the berries. take the other bowl and whisk in the milk. once mixed, pour over the berries. bake cobbler at the 350°F for about 1 hour and 5 minutes. the crust should be light brown and not gooey, and the fruit shouldn't be overly runny.
in my opinion, it's best if it cools for at least a little while before serving.
verdict:
mom's recipe does call for self-rising flour in the crust, but i didn't have any. and since i don't spend a whole lot of time baking things, i figured i'd make do with the all-purpose version. and although recipe also calls for a whole stick of margarine, i think that's pretty much overkill. next time i think i'll cut back to 3/4 stick and see how that works.
also, i may have used less fruit than i should have. from what i recall, the cobbler is a lot deeper when mom made it. overall, though, i think the mixed berries works fairly well. i can't quite discern the strawberries, but the cobbler is a little less tart than if only blackberries are used. which counts as a successful experiment, in my book.
Subscribe to:
Posts (Atom)
