Showing posts with label experiments. Show all posts

Friday, July 27, 2018

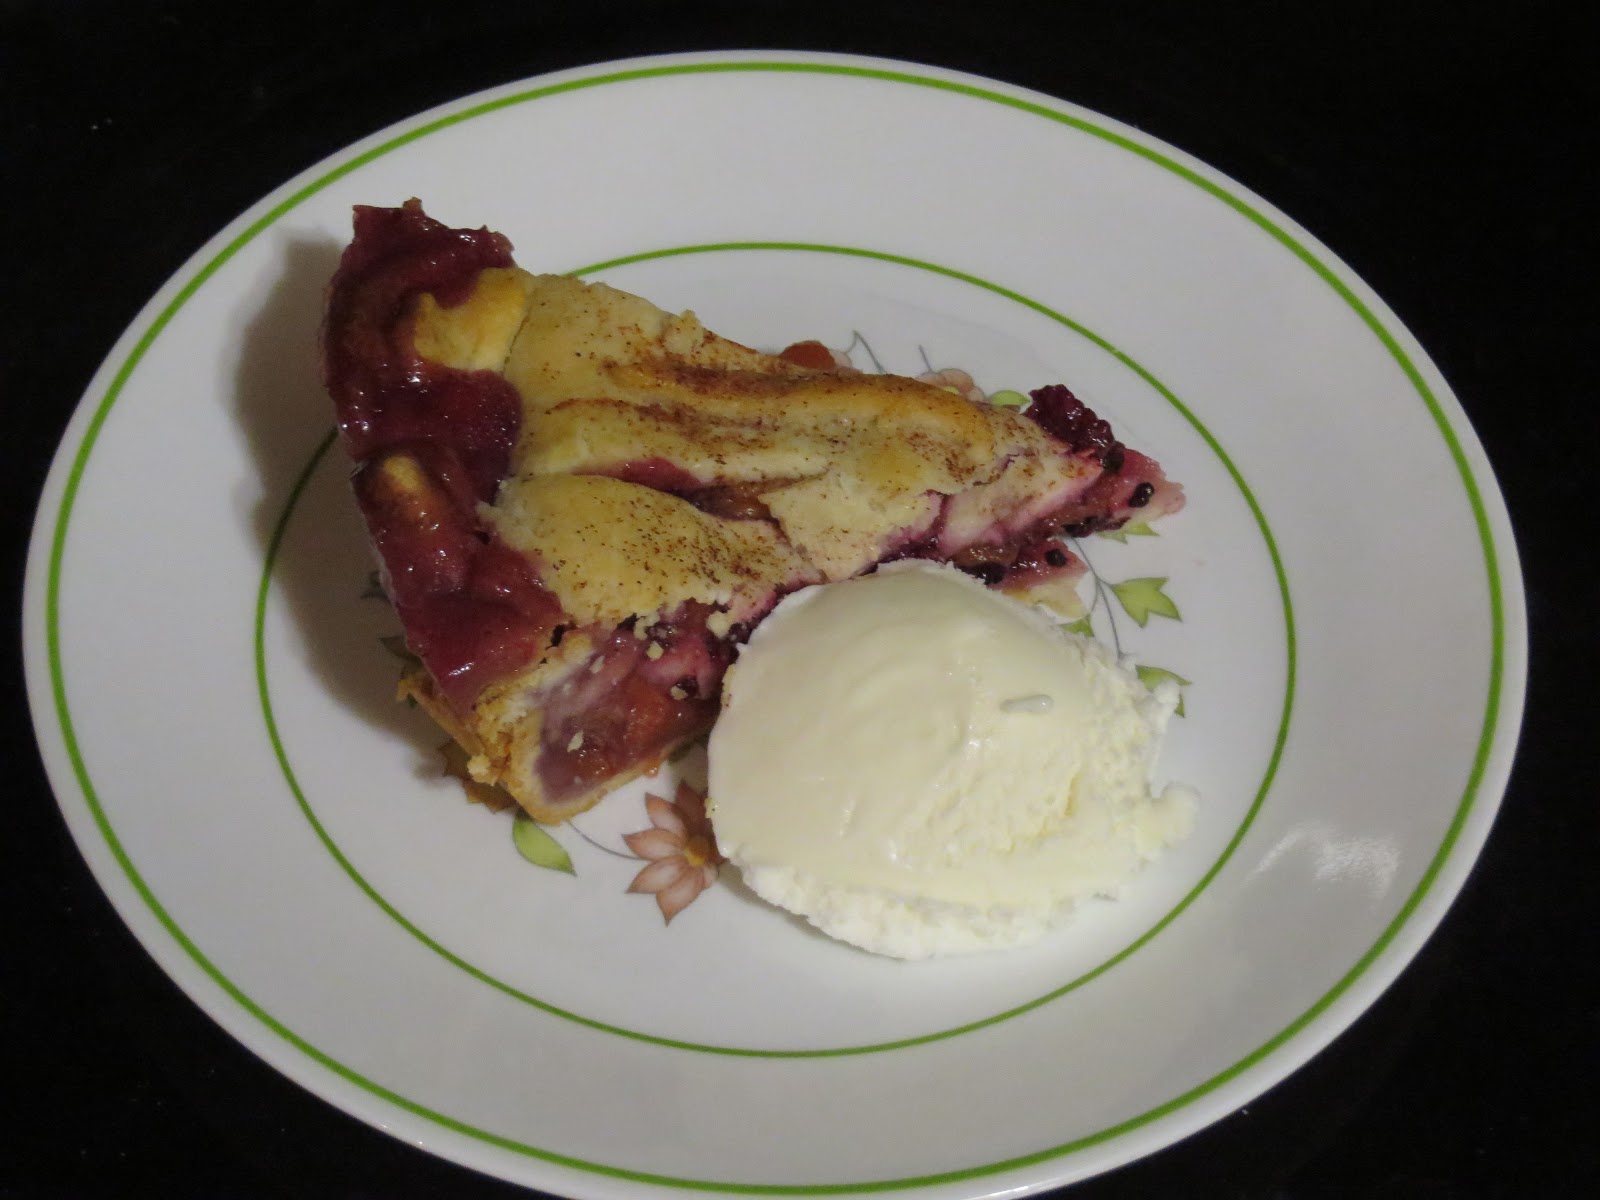
peach and blackberry pie

so over the july 4 holiday, my uncle asked why i never posted any recipes anymore.  and i didn't have a good answer.  being busy isn't an excuse because it isn't like i'm not cooking anything.  so i'm trying to make the effort to remember to take photographs and to document what i've been doing.  that said, i'm still being slow about it (this pie was baked back on july 9)...but at least i'm posting!

jackie found a recipe for this blackberry and peach pie online, and she wanted me to try it.  we had picked up some peaches from a roadside stand outside rockingham, nc, on our way back from the beach (frozen by now, of course), but we needed some berries.  so jackie came with me on her very first blackberry-picking expedition.  after the briars and the bugs and the heat, it might be that she'll leave the berry picking to me in the future, but she did good!


ingredients:
~ 2.5-3 cups fresh blackberries
~ 3 peaches, skinned/sliced/pitted
- 3 tablespoons cornstarch
- 3/4 cup sugar
- 2 tablespoons butter, melted
- 1 tablespoon cinnamon
- 1/2 tablespoon nutmeg
- double crust (premade)

preparation:
mix the berries, peaches, cornstarch, and sugar in a large bowl.  contrary to the online recipe, i also stirred the cinnamon and nutmeg into the mixture.

press one pie crust into the bottom of a pie pan.  pour the fruit mixture into the pan and cover with the second crust.  crimp the edges together to seal the pie.  cut slits in the pie for venting.  i got a little fancy and cut out a few ovals in addition to a few slits.  brush top of the pie with the melted butter.  i also sprinkled a little bit of white sugar and cinnamon on the crust.

put pie in oven (preheated to 450°F) for 15 minutes.  reduce heat to 350°F and bake until crust is golden brown.  for me, this took about 37 minutes.


verdict:
this is a good pie and pairs very nicely with vanilla ice cream.  one downside was the crust; it was cooked properly but just wasn't as flaky as, say, a pillsbury crust.  as an alternative, it would be a great cobbler filling.  i'll definitely make a version of it again!

Saturday, February 20, 2016

key lime pie

last week, i was at the grocery store and saw a cart of rewrapped produce.  there were bags and bags of limes, avocados, tomatoes, and other things, and it was all dirt cheap.  jackie's assumption (a good one, i think) was that it was remnants from super bowl sunday where they were trying to get rid of guacamole ingredients.

at any rate, $0.98 for a bag of about 15 key limes was too good a deal to pass up.  i decided it was time to attempt a key lime pie.  i made use of the joy of cooking for the recipe, which turns out to be surprisingly easy.

for this attempt, i did a two-pronged approach.  i was really only interested in making key lime tartlets (is that a good description of a mini-pie?), but i was willing to make a crust from scratch.  however, i also found some pre-made graham cracker crusts in two inch pie tins.  so i decided to do both.


ingredients:
- 14 oz can of sweetened condensed milk
- zest of about four limes
- about 1/2 cup lime juice (about 5 limes)
- four large egg yolks

- one cup graham cracker dust (about 5 oz of pre-dusted crackers)
- 1/2 stick butter

preparation:
for the crust, i pulverized the crackers in jackie's magic bullet.  in retrospect, though, it would've been far easier to put the crackers in a bag and simply use a rolling pin.  live and learn, i suppose.  i also threw a little nutmeg and cinnamon into the dust.  i melted the butter, mixed it into the dust, and formed the crust.  i spooned the mix into a pie pan and pressed it into a crust.  to set things, i baked the crust at 350°F for about ten minutes and let it cool before adding the filling.

for the filling, i mixed the milk, the lime juice/zest, and the egg yolks together and scooped it into the pie crusts.  with six tartlets and one regular pie, the regular pie didn't get a whole lot of filling (but that's okay).  the recipe book says to bake at 325°F until it looks set; given the smaller size of the tartlets and the thinness of the regular pie, it only took about 10 minutes to cook properly.

verdict:
i am very happy with this result.  there was a good amount of citrus flavor to the filling, and it was nicely creamy.  the premade tartlet crust was decent, and i was surprised (in a good way) with the homemade graham cracker crust.  even though it's annoying to get the crust properly spread out in the pan, i think i'll continue with that for larger pies.  i might even use a muffin tin to make mini pies in the future.

Friday, November 6, 2015

hummingbird cake

it's been awhile since i've documented something, so it's about time i put something up.  especially considering i baked this hummingbird cake on october 19!

i had been wanting to try making a hummingbird cake for awhile, and i decided to go for it.  partially because i had some bananas that were getting brown and partially because i just felt like it.  the recipe was mostly based on the one found here, but i cheated on the frosting by using a store-bought can.


 ingredients:
- 3 cups all-purpose flour
- 1 teaspoon baking soda
- 1 teaspoon salt
- 2 cups sugar
- 1 teaspoon ground cinnamon
- 3 eggs
- 1 cup canola oil
- 1 1/2 teaspoons vanilla extract
- 1 (8-ounce) can pineapple, undrained
- 1 cup pecans
- 2 cups chopped bananas (i didn't measure as much as use two or three small ones)
- cream cheese frosting (i used pillsbury)
 
preparation:
combine the dry ingredients in a large bowl.  add eggs and oil until the dry ingredients are moistened.  stir in the vanilla, pineapple, bananas, and pecans.
 
split the batter between two round cake pans (greased and floured).  bake at 350°F until  browned and a toothpick comes out clean.  i think my pans are a little bigger than the ones the recipe recommended, so it took somewhere on the order of 30-35 minutes to bake.  cool in the pans on a wire rack for about 10 minutes, and then remove from the pans to cool completely.
 
once cool, spread the cream cheese frosting between the layers and then on the outside of the whole cake.  store in the refrigerator.


verdict:
i did a few things wrong on this.  first, i made the mistake of using the pineapple chunks instead of the crushed pineapple.  don't get me wrong, it worked out just fine, but it just wasn't spread around enough.  also, i may not have broken the pecans into small enough pieces.  but these were merely cosmetic issues.  overall, the cake was delicious!  though a little dry the day it was baked, storing it in the fridge seemed to prevent it from being completely dried out on subsequent days.  i would do it again!

Sunday, July 12, 2015

blackberry quick bread

there are blackberries growing along the greenway behind the house, and they are good ones, too!  which is quite convenient and beats doing what i did last summer - which was trekking alongside the road picking somewhat inferior berries.  this weekend, i spent a couple hours picking a gallon of blackberries.

i froze most of them, but i wanted to do something different with the cup or so i reserved.  i toyed with the notion of trying something i heard from my dad...apparently a gentleman told him that the best thing to do with blackberries was to stew them with some honey or sugar and serve them over buttered biscuits (and a slice of hoop cheese on top).  this sounds like a pie without the pie, and it certainly works for strawberry shortcake, so i could see it.  however, today, i decided to try a quickbread.


i'll admit that i took this recipe from something i found online.  i suppose the joy of cooking might have had something on quickbreads in general, but i didn't find anything specific to blackberries.  so i decided the internet would provide this time.

preparation is quick/easy and only takes about 10 minutes.  cooking takes about an hour, and then it takes a little time to cool before cutting in and enjoying.

ingredients:
- 2 cups flour (all-purpose)
- 1 cup brown sugar
- 2 teaspoons baking powder
- 1/2 teaspoon salt
- blackberries (i had maybe a cup and a half or so)
- 3/4 cup milk
- 2 eggs
- 1 teaspoon vanilla extract
- most of a stick of butter

preparation:
mix the flour, sugar, baking powder, and salt into a large bowl.  gently stir in the berries until well coated.

melt the butter in a separate bowl.  mix the eggs, milk, and vanilla with the butter, and incorporate into the dry mixture.  stir batter until fully mixed and add to a greased bread pan (i used a 4" x 9" pan).  bake at 350°F for about an hour, or until the loaf is golden brown and a toothpick stabbed into the top comes out clean.  let cool for about 10 minutes before removing from the pan.

verdict:
this particular recipe is less sweet than i was expecting.  considering how there was only a cup of sugar, i suppose this shouldn't be any real surprise, but it lacks that certain something.  after talking to mom, it could be improved upon by toasting a slice with cinnamon sugar -- or by applying (gasp!) blackberry jam and/or honey.  shawn suggests adding something savory -- like perhaps a goat cheese (which i could see).

nonetheless, the bread did cook through properly, and the berries did not burst, so it was a pretty loaf.  i might play with this in the future.

zucchini casserole

so this is rather belated, but i tried a recipe a few weeks ago that i'm finally getting around to documenting.  i had some zucchini lying around and wanted to do something with it.  my initial thought was to do something similar to the pork and aubergine casserole, but it turned into something a little different along the way.


 total prep/cook time is roughly 40 minutes, and there were maybe 4-5 servings.

ingredients:


- 18 oz mild italian sausage
- 1 large zucchini
- 24 oz jar of spicy tomato and basil sauce (i used a variety called "classico")
- bag of italian six cheese  blend.

preparation:
remove the sausage from the casing and brown over medium-high heat.  when mostly browned, add thinly sliced zucchini into the pan.  when tender, add the jar of sauce and simmer mixture for several minutes.

pour mixture into a baking dish and sprinkle the cheese evenly to the top.  cover with aluminum foil and bake at 350°F for about 25 minutes.  serve over rice (i used basmati).


verdict:
this was a strange dish.  there was a nice kick to it from the sausage and the spicy tomato sauce, but it wasn't overpowering.  served over rice as it was, it felt almost like an indian curry-type dish, but it was using italian flavors.  an odd combination.  overall, it was a little watery, and there wasn't any particular textural contrast to the dish.  if i could've gotten the cheese to crisp up a bit, that might've been a worthwhile addition.  possibly baking some cheese separately on a pan and adding it afterwards could work.  all told, though, the aubergine casserole was probably superior.

Friday, April 10, 2015

chicken roll-up

jackie was very sad that i ate the rest of the pepper stuffing last night, so i promised to make dinner tonight to make up for it.  after pondering the options and scrounging some mismatched ingredients, i decided on chicken roll-ups.  that's a technical term.  trust me, though, when i say that they taste better than the descriptive name may imply.


this dish took maybe 20 minutes to prepare and about 30 minutes to cook.  served with green beans and corn on the cob.

ingredients:
- boneless chicken cutlets (i didn't pay attention to the weight)
- sundried tomatoes
- baby spinach
- bacon
- feta cheese (i used garlic & herb crumbles)
- lemon juice
- salt/pepper

preparation:
wilt the spinach in a pan (medium heat) with a little bacon fat.  add sundried tomatoes (i have a little jar with tomatoes and herbed oils) to the mix, and crumble in about three pieces of cooked bacon.  add a little black pepper and lemon juice, and stir until warm.  remove from heat.

pound out the chicken cutlets to make them thinner.  i will say that putting wax paper under and over the chicken makes it such that the mallet doesn't get all chickeny and contaminated.

spoon feta cheese and the spinach mixture onto each of the flattened cutlets.  roll up each cutlet and transfer to a greased pan.  put the seam on bottom so it doesn't unroll while cooking.  sprinkle with salt/pepper and more feeta, and spritz with a little lemon juice.

cover dish with foil and bake at 350°F for 20 minutes.  remove foil and bake for an additional 10 minutes or until chicken is cooked.


verdict:
this dish was amazing.  the chicken was tender, and the filling was on point.  the juice in the bottom of the pyrex was something i could just lick up!

as an improvement idea, though, i might need to pound the chicken out a little thinner.  it would make it easier to roll up.  further, if i were to serve this dish at a party or somesuch, i would definitely use the roll-up-in-saran-wrap method (a la freddington) to make a tight cylinder that wouldn't fall apart when cutting it.  jackie also speculated that capers would fit into the filling (and i think she may be on to something there).

will cook again!

Sunday, March 29, 2015

fried potato cakes

so last week, i saw a cooking show on tv where someone prepared fried potato cakes...and it looked intriguing.  later in the week, i saw a rosemary and white cheddar potato cake on a restaurant menu.  this reminded me that i thought the concept was interesting.  so i decided to attempt it on my own.  because why not?

tonight, i cooked some green beans, reheated some of jackie's pulled pork, and had some potato cakes on the side.


in this case, the potato cakes are merely a side, but i prepared them ahead of time.  prep time took about 45 minutes (of which only 10-15 are active for prep) and about 10 minutes of cooking.

ingredients:
- 1 lb redskin potatoes
- 1.5 tablespoons butter
- milk (maybe 1/8 of a cup)
- herbs/spices (dried rosemary, fresh thyme, garlic powder, salt/pepper)
- shredded cheese (i used italian six cheese blend)
- vegetable oil

preparation:
boil the potatoes ahead of the actual cooking time (taking about 30 minutes).  once cooked, drop the potatoes in a bowl and mash them with the butter and the splash of milk.  stir in the herbs.  once everything is blended, put it in the fridge for later.

when you're ready to cook, take the cheese out of the fridge and add the shredded cheese (i put in about 1/3 cup, but that really wasn't enough).  once the cheese is incorporated, form patties/cakes out of the potato mixture.  for my experiment, i made a total of seven cakes.  put the cakes back in the fridge until just before cooking.

add vegetable oil to the bottom of a frying pan (just enough to cover the bottom) and bring it up to a medium-high heat.  place the cakes in the pan and brown for about 1.5 minutes per side.  through trial and error, i learned to squish the cakes immediately after being placed in the pan.  this ensures they get properly flattened.  once browned, remove from the pan, place on a paper towel, and dust with some salt.


verdict:
overall, i am intrigued by this recipe.  the first couple cakes didn't work quite as well because i flipped them too soon; they thus did not brown and instead fell apart.  however, subsequent cakes turned out nicely brown/crispy on the exterior and soft/warm on the inside.

in principle, it was excellent.  however, i didn't use quite enough cheese, so that flavor profile wasn't as prominent as it could have been.  for future versions, i would need to use more cheese in the cakes (and possibly use something with more bite, like sharp cheddar).

beyond this, i see these cakes as being versatile options.  they could be used as a side dish, but they could also be made into a breakfast entree by incorporating bacon.  additionally, my lovely assistant (and chief taste tester) suggested that this could become something of a dessert by using mashed sweet potatoes, toasted nuts, and pie spices.  i could even see using cranberries or raisins in such a mixture.  certainly food for thought!

interestingly, this is the first time i've ever made homemade mashed potatoes.  admittedly, it wasn't a full-blown mashed potato recipe (which would require more milk and more thorough mashing), but i think i could manage to do that in the future.  good to know!

Sunday, February 1, 2015

pineapple chicken

after much debate, the matter of dinner last night was settled.  first was a thought of tacos, but that didn't sound quite right.  a vague notion of pepper stuffing was similarly discarded.  after discussing the possibility of a stir fry, jackie and i pondered orange chicken.  this (naturally) led to the idea of a sweet and sour pineapple chicken.

given how i've never made a sweet and sour sauce myself, this experiment sounded worth trying.  for a total of about 30-45 minutes to prepare and cook, we ended up with a dish with approximately four servings.


 ingredients:
- 1.25 pounds chicken (boneless breast meat, cut into chunks)
- one 12 oz package of frozen mixed vegetables (this packet had peas, carrots, broccoli, and water chestnuts)
- one 20 oz can of pineapple chunks
- 3 tablespoons brown sugar
- 3 tablespoons champagne vinegar
- 1 tablespoon honey
- 1 tablespoon soy sauce
- cayenne pepper
- ground ginger
- cornstarch

preparation:
for the sweet and sour sauce, mix the sugar, honey, soy, and vinegar into a sauce pan.  add most of the pineapple juice from the can (approximately 3/4 cup) and simmer, stirring occasionally.  after simmering for maybe 5-10 minutes, turn the heat off and leave for later steps.

add cornstarch (i didn't measure, but perhaps 1/3 of a cup) to a bread bag.  season the cornstarch with ground ginger and cayenne, and shake the bag to mix evenly.  place chunks of chicken in the bag and shake to coat thoroughly.

put oil in a large frying pan and bring to a high heat.  add the chicken to the pan to brown.  once the chicken is cooked, add the vegetables to the pan and stir until vegetables are warm.  add the pineapple and pour the sauce over everything.  stir until everything is coated evenly.  allow to simmer for several minutes.  remove and serve over rice.


verdict:
there were some flaws in this recipe -- but nothing that made it inedible.  the largest problem may have been how i cooked the chicken.  in my case, i probably underseasoned the cornstarch (more pepper and ginger would've been okay), and i didn't start with a hot enough pan.  the chicken didn't brown quite enough, and there wasn't quite enough crispiness on the outside.

also, the proportions for stir fry were a little off; i probably could've used a little less chicken and a little more vegetable.

finally, next time i may need to reduce the sweet and sour sauce a little further; it was a little more liquidy than i had anticipated.  maybe letting the sauce sit overnight would have helped it become more viscous.

all in all, though, i am pleased with myself and would try something similar again in the future.

Friday, December 5, 2014

beef freddington

what, you ask, is beef freddington?  well, it is what you get when you adapt beef wellington by removing the mushrooms.  this recipe is probably the most ambitious thing i have ever cooked (and certainly the fanciest), and i created it the day after thanksgiving (by special request from my sister).  she wanted beef wellington but hates mushrooms (and frankly, who can blame her for that).

selfie!

after reviewing the all-knowing internet, i found ways to adapt the recipe to remove mushrooms...but most resources vehemently declared that removing the mushrooms effectively makes it something other than "beef wellington."  so my sister said that i could call it "beef freddington."  i think this works just fine.

because you sometimes need to eat something other than turkey the day after thanksgiving

the basis for my recipe comes from chef gordon ramsay's beef wellington recipe (see video here and recipe here), to which i made various adaptations.  it's not a terribly difficult recipe to follow, but the preparation is a little time-consuming.

ingredients:
- about 1.5 pounds beef tenderloin (yeah, this is xpnsv)
- proscuitto (i used 6 slices)
- english mustard
- one small eggplant
- package of raw chestnuts (approximately 1 pound unshelled)
- 2 cloves garlic
- puff pastry (i used two sheets of frozen pastry)
- 1/2 granny smith apple
- rosemary and thyme
- salt/pepper
- 2 egg yolks
- olive oil

preparation:
i roasted (and shelled) the beforehand using instructions found online, which turned out to be a good thing.  shelling chestnuts is very time-consuming, and it makes ones thumbs hurt after awhile.  i ended up with about a quart of shelled nuts.

i salted/peppered the tenderloin, put olive oil in a hot cast-iron pan, and seared the meat just enough to get a nice caramelized color on all sides (including top and bottom).  as a hint, pressing the meat up against the side of the pan helps provide a nice sear.  remove the meat from the stove and brush english mustard on the entire tenderloin.  set aside to cool while preparing the duxelles.

you might think it's too much mustard...but it is not

the duxelles is the filling between the puff pastry and the meat (apparently used as a tasty moisture barrier).  where normally it's made of minced mushrooms, i made my own version.  mix the (chopped) eggplant, half a granny smith apple, the garlic, and the chestnuts and blitz together with salt/pepper in a food processor.  i made a rather coarse mixture, but i think it would work better to make a very fine mixture.  cook the mixture in a hot, dry pan (maybe medium heat) to help dry out any remaining moisture.  i also added fresh rosemary and dried thyme.  once the mixture is starting to brown (it took maybe 10-15 minutes), remove the duxelles from the pan and set aside to cool.


using a long sheet of cling wrap as a platform (leave it on the roll), take the proscuitto and overlap it a rectangle.  i made my rectangle to rows of three.  add a little black pepper.  once the duxelles are cooled, spread them on the proscuitto (leaving a clear edge of approximately 1/2" around the perimeter).  put the beef in the center and use the cling wrap to fold the proscuitto/duxelles around it.  tightly wrap the cling wrap around the beef (squeezing the ends together to create a log).  refrigerate for about 15 minutes to allow it to get firm.


encase the beef in puff pastry; i had to connect my two sheets of puff pastry together to get something long enough to fully encase the freddington.  trim any excess pastry (use it for dessert!  i cut it into squares, brushed with butter, added a little jam or honey/nuts, twisted the tops together, sprinkled with cinnamon sugar, and baked at 400°F for about 15 minutes) and twist the ends of the freddington together.

yummy

again, tightly wrap the freddington in cling wrap and return the cylinder to the fridge.  i did my prep in the morning and didn't cook it until evening, so i left it there awhile.  apparently this is something that you can prepare in advance for dinner parties or whatever.

when you're ready to cook, remove the freddington from the fridge and brush with egg yolk (i mixed the two egg yolks with a little water to make it easier to brush on).  for decorative purposes, use the back of the knife to create a line down the spine of the freddington, and then twist the knife down the sides to create a ribbing effect.  sprinkle the top with a little salt.

bake in the oven at 400°F for approximately 35 minutes or so.  the meat shouldn't be overcooked, so you're looking for a nice rare to mid-rare.  i used a meat thermometer to tell me when the internal temperature was approximately 125°F.  remove from the oven and let rest for at least 10 minutes before slicing.
almost a pretzel texture on the very outside

verdict:
this was totally worth the effort.  the aroma as i sliced the freddington was amazing; there was a sweetness (probably the chestnuts and the apple), but it wasn't overly sweet.  the eggplant was hard to distinguish, which makes me think that mushrooms may not be noticeable if they were used, either.  the english mustard (used because it has more of a kick than regular mustard) isn't overpowering, but you can definitely taste it on the palate.  obviously, the middle of the roast was a little more rare than the edges, but everything was exceedingly tender.

so good...

i would make a few changes to the recipe in the future, though:
  • as i noted previously, i would chop the duxelles a little finer in the future, and i might use a little more apple.
  • for future wrapping purposes, i would probably also overlap the cling wrap; the roast was a little longer than i had anticipated, so there wasn't quite enough width of cling wrap to effectively roll the freddington.  having a doubled width would make that a non-issue.
  • i'd also do a better job putting the puff pastry sheets together.  as you can see below, there was a slight split in the seam.
  • i would also roast this on a baking rack (as opposed to directly in a pan).  despite the moisture barrier of the duxelles, there were still some juices that the puff pastry sat in, and cooking on a rack would prevent that slight sogginess.
it split =(


Saturday, November 8, 2014

baked pineapple

pineapple is pretty much awesome.  admittedly, it's not an apple, and it doesn't taste/smell like pine, but that's beside the point.  and baking a pineapple should make it twice as awesome.  especially if it's done to look like how (a surprisingly cheerful) gordon ramsay cooks it.  which is to say that it's baked in a salt crust.  for reference, the recipe is here.

unfortunately, i am not gordon ramsay.  which means that my experiment was pretty much a failure.  i'm not even bothering to photograph this disaster because, well, it kind of looked like a regular pinapple afterwards.  i ended up just butchering the pineapple in a traditional fashion for later consumption.

part of the problem may be that i used a non-miniature pineapple.  using a regular sized pineapple may have made it need to bake longer, which i didn't really do.  a secondary problem may have been my salt-crusting technique.  i don't think i made the salt mixture wet enough (not enough egg), so it didn't stick.  very frustrating.

maybe i'll try it again...but not anytime soon, i don't think.

Sunday, November 2, 2014

shrimp creole

so jackie recently gave me an assortment of spices and a recipe for what is supposedly the most authentic gumbo ever.  said recipe came from diane at spice it to a tea (in brevard, nc).  upon closer examination, the recipe says it's for shrimp sauce piquante (aka shrimp creole), and wikipedia seems to imply that gumbo and shrimp creole are slightly different recipes.

regardless of semantics, it is in fact pretty darn good.


this particular recipe probably took me upwards of four hours to finish, and it makes about six servings.  i was quite impressed.

ingredients:
- 2/3 cup oil (i used grapeseed oil)
- 1/2 cup flour
- 1 3/4 cup sliced scallions
- 2/3 cup chopped celery
- 1 cup chopped onion
- 1/2 cup chopped green bell pepper
- 4 teaspoon minced garlic
- 3 tablsepoons minced parsley
- one pound canned whole peeled tomatoes (i was duly informed that using the "san marzano" brand was imperative)
- eight ounce can tomato sauce
- approximately 1 pint of chopped okra
- 1 tablespoon minced chives
- 4 tablespoons dry red wine
- 4 bay leaves
- 6 whole allspice
- 2 whole cloves
- 2 teaspoons salt
- 3/4 teaspoon black pepper
- 1/2 teaspoon cayenne
- 1/4 teaspoon chili powder
- 1/4 teaspoon mace
- 1/4 teaspoon dried basil
- 1/4 teaspoon dried thyme
- 4 teaspoon lemon juice
- 2 cups water
- 2 pounds shrimp

preparation:
instead of using water, i decided to use the shrimp shells to make stock.  the shrimp i got were headless and pre-deveined, so i just peeled them and add the shells to a pot of water.  i boiled them for about an hour or so with a little garlic powder, black pepper, and cayenne.

i prepared the vegetables (it takes a surprisingly long time...maybe 30 minutes or more) and added them all to a bowl before even starting on the roux.  i should also note that i didn't specifically measure the vegetables.  if there was a little more or less, i wasn't too fussed.

for the roux, i heated the oil in a large pot and gradually added the flour, stirring constantly.  the roux should be cooked over low (to medium-low) heat until it turns a medium brown (the color of peanut butter).  this takes a significant amount of patience and constant stirring, and i ended up spending about 30 minutes getting it to look right.

remove the pot from the heat and add the vegetables (sans okra) and parsley.  mix well with the roux and return to low heat.  cook, stirring constantly, until the vegetables begin to brown (approximately 15-20 minutes).

mix in the canned tomatoes and sauce, add the chives, wine, seasonings, and lemon juice, and stir thoroughly.  raise the heat and bring to a low boil for maybe 15 minutes.  add the water/shrimp stock, stir, and simmer for 45 minutes.  add the shrimp and okra and simmer for 20 minutes.  remove from heat and allow to stand (covered )for about 10 minutes before serving.

verdict:
served over white rice, this was a good dish for a cold, blustery afternoon.  i was expecting a little more kick, but it wasn't excessively spicy.  the tomato seems to tone things down a little, but a light burn does hit the palate after the first couple bites.  i would cook this again, though i might be tempted to throw in even more vegetables and maybe some sausage.  maybe that's not an authentic way of adapting the recipe, but it seems like it would be a most enjoyable adaptation.

a few comments, though:
  • if you let someone else help measure out the spices and whatnot, it helps if said assistant can read the measuring spoons.  mine isn't sure if she used two teaspoons (or two 1/2 tablespoons) of salt!
  • despite the recipe's direction to crush the bay leaves, this i would rather leave them whole (and then fish them out before serving) in the future...because crushed bay leaves seem to get stuck in teeth.
  • more shrimp may be preferable.  after the fourth serving, the number of shrimp seemed to taper off.
  • this is a rather time-consuming (but worthwhile) dish; apparently it is a good idea to double the size of the sauce recipe and then freeze it for future use (thaw it and drop in fresh shrimp at that point in time).  it would certainly help the problem of "what am i going to do with all these extra chives and parsley?"

Sunday, October 12, 2014

pumpkin banana bread

referencing again my pumpkin experimentation, i decided to attempt a pumpkin bread with cream cheese.  things morphed when i realized i didn't have as muh pumpkin puree left as i thought.  so i tossed in a soft banana that happened to be laying around.


this attempt was based on the banana bread recipe, with some minor revisions.  the flour/sugar/etc proportions are the same, but i obviously used pumpkin puree.  i had maybe 2-3 cups of puree, which didn't seem like enough...so i mushed up a small banana, as well.  in addition, i added some ground cloves, some cinnamon, and some nutmeg because i figured it'd be a good idea.

due to poor planning and inadequate research, my attempt at incorporating cream cheese backfired.  clearly, just putting chunks of cream cheese in the bread batter does not work; it doesn't bake particularly well, it isn't particularly appetizing, and it makes the bread fall apart.  so i ended up breaking the bread open and spooning the cream cheese out.  in hindsight, the internet says that mixing the cream cheese with sugar, egg, and vanilla extract, and spooning a thin layer into the banana bread would be the way to go.  duly noted, internet...duly noted.

aside from wasting cream cheese, the bread itself is marvelous.  will have to try again!

Friday, October 10, 2014

pumpkin pancakes

once i made pumpkin puree, the next step is to do something with it.  i decided to experiment with pancakes.  for dinner, no less!


this recipe, which was cobbled together from about three pumpkin pancake recipes i found online, took maybe 30 minutes or so to prepare and cook, and it makes about three brian-sized portions.

i will also say that the ordinary syrup i had in my pantry was apparently "too old," so i was presented with a container of maple syrup on the condition that i threw the previous syrup away.  needless to say, that was done...

ingredients:
- 3/4 cup oatmeal
- 1/2 cup flour
- 1.5 teaspoon baking powder
- 1/4 cup sugar
- cinnamon, nutmeg, clove
- 1 cup milk
- 1 tablespoon oil
- 1 egg
- 1 cup pumpkin puree
- dried cranberries

preparation:
mix the dry ingredients (and cranberries) together in one bowl.  mix the wet ingredients together in a second bowl, and then slowly incorporate them into the dry ingredients.

bring a pan up to just over medium heat (this is the tricky part; previous stoves required a medium-high heat for pancakes, but my current one didn't like that).  add some oil or butter to the pan, and spoon in a dollop of batter (between 1/4 and 1/3 cup per pancake).  i started with canola oil but switched to butter on jackie's recommendation.  she thinks i should use coconut oil in the future (which is probably not a bad idea; i've used it before with good results).

as with all pancakes, cook until the edges bubble and then flip.  remove and eat.

pictures and discussion:
this was a mixed result.  i started out with unimpressive results that are documented below.

initial, not-pretty pancakes:


i started out using my cast iron pan.  i've successfully cooked very pretty pancakes on cast iron before, so i know it's possible.  however, i'm fairly certain that i got the pan too hot, which made for some cajun-style pancakes.  however, despite their appearance, they still tasted good.  they didn't even have the crunchy texture usually associated with burnt food.

subsequent, prettier results:


i swapped to a regular non-stick pan (and butter) to get these results.

overall verdict:
although tasty, i admit that these pancakes are not very traditional.  they were kind of dense and not particularly fluffy.  additionally, the pumpkin inside seemed to be a little moist (not uncooked, but definitely not pancakey).  still, they were very autumnal; pumpkin and cranberry does seem to play together nicely, and the maple syrup is an excellent topping.

i think the issues were the result of several factors:  first, i may have used too much oatmeal.  i started with about 1/2 cup, but i added a little more to thicken the batter.  the oats probably made for a little extra-dense cake.  also, i may have used too much pumpkin.  none of the recipes i referenced used quite so much, but i thought, "hey, more is better, right?"  a little less pumpkin would have still given the flavor without the unnecessary moisture.  finally, getting the temperature right from the get-go is probably an important factor.

maybe next time i'll just break down and get bisquick and add pumpkin?

pumpkin puree

with the risk of being trite, i wanted to play with some pumpkin.  i've never really cooked with it before, and i wanted to see how difficult it was to work with.  the store happened to have some of said pumpkins on sale (how serendipitous and alliterative!), so why not?

in this case, i found alton brown's good eats episode on pumpkin pie to be very useful.  the recipe is here, and the video (very useful) is here.

ingredients:
- baking pumpkin (roughly 3ish pounds, maybe?)
- salt

preparation:
break the stem off the pumpkin and split it in half (top to bottom).  scoop out the seeds and guts (and save for roasting later).  sprinkle the inside of the pumpkin with salt; per mr. brown, it helps absorb some of the water content.  place pumpkin halves on a baking tray lined with parchment paper, and bake at 400°F for about 30-45 minutes.  you can tell it's done when the skin is soft enough to poke easily with a fork or knife.

remove the pan from the oven and let cool for 30-60 minutes.  very important not to burn your fingers!

theoretically, you have to scoop the pumpkin out of the skin and into a food processor.  however, in my case, i just lifted the skin off the pumpkin, and then i had to spoon it from the pan into the processor.  so it works.  puree the roasted pumpkin until smooth and refrigerate/freeze.

Friday, September 12, 2014

butternut squash and corn bisque

as a recurring theme, i recently obtained some butternut squash from my dad's garden.  in an effort to do something adventurous and experimental, i decided to make a soup with it.  and i'll admit, jackie's recent soup may have made me think about making something of that nature on my own.  also, i wanted to empty out my freezer a little bit...

this was a sort of time-consuming endeavor (about an hour and a half or so for total preparation and cooking), but soups aren't quick.  so i'm okay with that.  all told, there are probably about five brian-sized portions out of this pot of soup.


ingredients:
- 3 ears corn
- 3 butternut squash (one kind of smallish, two medium)
- chicken stock (about 4-5 cups)
- seasonings (nutmeg, cinnamon, thyme, cayenne/black pepper, salt)
- olive oil

the chicken stock was left over from making a pot of roasted potato soup awhile back, so i pulled it out of the freezer and made use of it instead of buying some stock or just using water.


preparation:
shuck the corn, coat with olive oil, and sprinkle with salt and a little cayenne pepper.  place on a baking pan.  scrub the butternut squash, cut off the stem, and cut them lengthwise.  scoop out (and reserve) the seeds.  coat the cut side of the squash with olive oil, cinnamon, nutmeg, and cayenne, and place face down on the baking pan with the corn.

roast the vegetables at 400°F for approximately 40 minutes or until the squash is tender to the fork-touch.  while the vegetables are roasting, wash the squash seeds and coat them with the olive oil and spice mixture (left over from coating the squash).  set aside on little pan for toasting (i actually used a small square of aluminum foil left over from some previous experiment).

once the vegetables are out of the oven, let them cool off for a few minutes (very important or else you burn your fingers...trust me, i'm all too familiar with the consequences).  cut the corn off the cob, scoop the squash out of the skin, and add it all to the chicken stock.  add salt, pepper (black and cayenne), some cinnamon and nutmeg, and some thyme.  simmer for approximately 25 minutes, stirring occasionally.  while the soup is simmering, bring the oven down to 350°F and toast the seeds for about 10-12 minutes.  if you start hearing the seeds popping around in the oven, they're probably done.  remove from the oven and set aside.

puree the soup in a blender until reasonably smooth.  note to self: do NOT put too much in the blender...it may try to explode all over the place...danger, will robinson!  serve with toasted squash seeds sprinkled on top.


verdict:
we struggled on what to call it ("chowder" seems to be nominally a cream-based potato and/or seafood soup, and "soup" seems to be too non-descriptive), but we eventually settled on "bisque," which seems appropriate.  it was surprisingly filling, and it had a nice mixture of sweetness and spiciness; the cayenne gave enough of a kick without burning out the palate.  the addition of the toasted seeds was perhaps the most important part; it provided a textural contrast that was necessary since the vegetables were all pureed together.

for future reference, i may not have added quite enough thyme (that flavor wasn't particularly noticeable in the final product).  also, i think that ground cloves would have been a good addition to the flavor profile.

this is an interesting experiment.  i admit i made it mostly as a novelty, but it turned out well.  it's something i would probably attempt again, but it isn't what i'd go back to again and again.  and i'd definitely wait until fall/winter next time...as tasty as it is, it just doesn't work for a relatively warm summer night.

Friday, September 5, 2014

hash and eggs

i felt like experimenting tonight.  and what i ended up making was nothing like what i originally intended.  but that's okay because it turned out moderately successfully.

in this case, i put a spin on hash and eggs.  total time was approximately 40 minutes (prep plus cook times), and i can probably get two brian meals out of it.


ingredients:
- 1 medium eggplant (courtesy of dad's garden)
- handful of potatoes (also courtesy of the garden)
- 1 small onion (starting to see a theme yet?)
- 2 medium-ish tomatoes (yup...definitely a theme)
- 2 eggs (nope...he doesn't raise chickens)
- olive oil
- spices (paprika, rosemary, garlic powder, basil, salt/pepper)

preparation:
chop the potatoes and eggplant, and toss them in a bowl with olive oil.  for what it's worth, i quartered the eggplant lengthwise and chopped each sliver in about 1/2 inch chunks.  mix in the spices (sans basil) and stir until the vegetables are thoroughly coated.

in a separate bowl, roughly chop the tomatoes and mix with basil.

spread the potatotes/eggplant on a lined plan and roast at 400°F for about 22 minutes.  remove from oven and set aside.

add some olive oil to a large pan and bring to a medium-high heat.  stir in the tomatoes and allow to cook for 2-3 minutes.  stir in the rest of the vegetables and cook for 3-4 minutes.

cook eggs over-easy(ish) and serve on top of the hash.

verdict:
this was much better than i was expecting.  i've never been a fan of runny eggs (or so i thought), but it works amazingly well when the yolk coats the potatoes and eggplant.  the tomato cooks down and gives a little tang to the whole dish.  i'm not an expert on cooking eggs in this particular fashion (hence the less-than-stellar picture), but i guess i can learn.

however, i do have two mild complaints.  first, the potatoes were a little hard.  when i do this sort of thing again, i'll chop them smaller and/or roast them a little longer.  second, i had intended to sprinkle a little parmesan cheese on the mixture.  oh well...there's always next time!

Thursday, July 24, 2014

eggplant, tomato, and turkey

last year, i had attempted a casserole that was moderately successful.  and when i raided my dad's garden this past weekend (i'm a regular peter rabbit, i am!), i absconded with a couple (small) eggplants.  he apparently wanted to see what they looked like while growing, so he planted a few this year.

i decided to tweak my previous recipe and try something a little different.  this time, i took some ground turkey, some eggplant, and some fresh tomato to make a casserole.  i was going to add some green peas, but they just didn't seem appropriate for this recipe.

prep + cook time was approximately 45 minutes.  this appears to be about three brian-sized portions.


ingredients:
- one large tomato
- two smallish eggplants
- one pound ground turkey
- olive oil
- various spices (salt/pepper, chili powder, oregano, basil, garlic, paprika, sage)
- feta cheese
- some parmesan (because it was there)

preparation:
brown the turkey on medium-high heat, pour off the grease, and layer in the bottom of a casserole dish.  i added salt and pepper, paprika, garlic powder, and some oregano while browning the meat.

peel/slice the tomato and layer it on top of the turkey.  add salt/pepper, basil, oregano, and whatever else smells nice.  i added a little sage. just because.  sprinkle a good amount of feta cheese on top of the tomato.

peel (most of) the skin from the eggplant and slice thinly.  brown the eggplant on medium-high heat with some olive oil, salt, and pepper.  once browned, layer the eggplant slices on top of the casserole.  sprinkle a little parmesan on top.

bake at 350°F for approximately 25 minutes.


verdict:
taste-wise, this is amazing.  the chili powder and pepper gave it a bite that wasn't too overpowering, and the overall spice mix gave a nice, savory flavor.  texture-wise, the eggplant proved problematic again.  the general consistency of the casserole worked nicely, too.  i was afraid that there wouldn't be enough juice, but the tomato cooked down just enough to allow a little something in the bottom of the pan -- but without everything being too soupy.

i had hoped that browning it in the olive oil would provide a sufficient barrier against over-cooking and toughness.  sadly, this is not the case...the eggplant was kind of chewy.  i'm at a loss on how to adjust things for the future.  possibly, i could put the tomato slices on top of the eggplant.  theoretically, this could allow the tomato to caramelize (which is an interesting notion).  this bears consideration.

in the meantime, go me!

Sunday, July 13, 2014

ratatouille

so i was looking at my supply of vegetables, and i wanted to do something different with my zucchini.  since i have this nifty copy of joy of cooking (courtesy of my sister), i went to the index to see what it would have for summer squash.  lo and behold, it sent me to a ratatouille recipe.  i decided to modify the recipe (slightly).


prep time is about 15 minutes, and total cooking time is about 45 minutes.  no rodent assistance with the cooking is required, even...i can do the preparation without a rat pulling my hair and jerking my arms around!

there appear to be about three brian-sized portions.

ingredients:
- 1 small eggplants (probably about a half-pound)
- 2 zucchini (again, about a half-pound)
- a few small sweet onions (hey, i had them so i figured i'd use them...)
- 3 garlic cloves
- a pint of diced tomatoes (canned from dad's garden)
- olive oil
- basil, thyme, salt/pepper

preparation:
although the recipe implies that the vegetables can be prepared as the food is cooking, i'd prefer to prepare everything before i start the cooking process.  as such, peel the eggplant (apparently the skin is tough) and cut into one-inch chunks.  also, cut the zucchini into chunks (skin can remain).  on a separate plate, slice the onions and finely chop the garlic.

add olive oil to a large skillet and to a medium heat.  add the zucchini and eggplant and cook, stirring until golden and barely tender (about 10 minutes).  remove the vegetables.

add the onions with a little olive oil until slightly softened and then add the garlic.  stir occasionally until tender but not brown (it took me about 6 minutes).

add the tomatoes, thyme, and salt/pepper.  reduce the heat to low, cover, and cook for 5 minutes.  add the eggplant and squash, and cook until everything is tender (about 20 minutes more).  stir in basil.


verdict:
i think it was the combination of the basil and tomato, but the dish was sweeter than i expected.  it also needs something to sop up all the juice; if i hadn't already planned on the starch of the corn, i'd've cooked some rice.  i like the flavor combinations, but it does seem to lack something.  maybe it has something to do with the fact that the diced tomatoes didn't really have any structure (they all fell apart in the pan).  if/when i cook this again, i'll have to play with it and see what else could work.  possibly carrots and green beans?

beyond all this, i had planned on sprinkling feta cheese on top.  but i forgot.  sadness.  i'll just have to remember to do it for the leftovers!

Sunday, April 20, 2014

pear walnut crescents

at some point in the past, i was discussing nutella bombs with my sister (crescent rolls with nutella baked inside), and we started brainstorming other worthwhile additions to crescent rolls.  these things aren't limited to just hot dogs, you know!

at any rate, one potential recipe we both thought sounded interesting was pears and honey.  over time, i refined what i thought should be used...and i finally got around to implementing the recipe.

total prep/cook time for this is about 30 minutes.


ingredients:
- 1 can crescent rolls (8 count)
- 1 pear (i used d'angou)
- walnuts
- honey
- butter
- cinnamon

preparation:
coarsely chop a handful of walnuts and one-quarter of a pear, and mix in a small bowl.  immediately eat the rest of the pear (this step is very important).

in  a separate bowl, melt a couple tablespoons of butter in the microwave.  stir in a little honey and cinnamon and reheat a tad just to loosen it all up.  pour honey-butter mixture over the nuts and fruit and stir to coat.

unfold the crescent rolls, spoon on a little fruit/nut mixture, and wrap up the crescents.  drizzle a little extra honey-butter on top.  place on a cookie sheet and bake at 375°F for approximately 12 minutes (or until golden brown).


verdict:
this was a neat experiment, and i rather enjoyed the results.  however, there were a few points that i recognized as being problem.  first, the pear wasn't quite ripe enough.  i tend to prefer crunchy pears for eating, but in this case, i think a little riper/softer/juicier would have improved the overall flavor of the stuffed crescent roll.

second, i don't think i used enough honey.  i added a good dollop to the butter, but it really didn't go far enough in terms of sweetness.  i don't mind savory by any means, but i had expected this to be more like a sweet dessert.  so next time, i need to have a little more honey in the butter...and brush the top of the crescents with it before baking (instead of just spooning a little on top).

finally, i will provide a caution: a quarter of a pear and a handful of walnuts goes a loooong way.  these crescent rolls are pretty small, and you can't really fit a whole lot in them.  i ended up eating the last few spoons of pear/walnut mixture because they didn't fit in the rolls.

addendum:
i think the crescents work even better the next day.  i refrigerated them and popped one in the toaster oven this morning, and it was wonderful.  the flavors melded a little overnight, and i took the crescent out of the toaster when the outside was nice and warm -- but when the pear bits were still a little chilled.  that juxtaposition was rather pleasant.

Saturday, April 5, 2014

bacon-wrapped pork chops

ah, spring...beautifully warm weather, windows open, hummingbird feeder installed, and bacon-wrapped pork chops.

i mean, what else would you have for dinner??

seriously though, i haven't cooked anything particularly exciting recently, so i decided to play with my kitchen today and make it smell nice.  there were some nice pork chops on sale at the grocery store earlier in the week, and i decided adding bacon can't be wrong.

this particular experiment took me about 15 minutes to prepare and about 40 minutes to cook.  total time to the plate can be under an hour, but i wrapped the chops earlier in the afternoon and left them in the fridge to let the spices infuse the meat.

with steamed broccoli and rice (cunningly flavored with garlic powder and rosemary), this made a wonderful dinner.


ingredients:
- bone-in pork chops (i would estimate about 1/2 pound apiece)
- bacon (not thick cut)
- brown sugar
- seasonings (jamaican jerk seasoning, tarragon, oregano, black pepper, garlic salt, paprika)

preparation:
spread some brown sugar on top of the pork chops (i used just enough to cover the top).  sprinkle liberal amounts of seasonings on, and pat the mixture into the meat.  wrap each pork chop in bacon (it took about four slices apiece to fully cover the chop).  apply more black pepper, oregano, and paprika to the outsides.

brown chops on stovetop (medium-high) for approximately three minutes on a side.  transfer meat to an oven-safe pan and bake (covered) at 350°F for approximately 30 minutes.  remove aluminum foil and increase heat to 425°F for approximately 10 minutes.  there was a lot of juice (well...probably bacon grease).


 verdict:
when cooking, this food smelled wonderful; i think oregano is just about my favorite herb, and it always makes the kitchen  smell nice.  that said, with the brown sugar, i didn't get nearly the fiery flavor of the jamaican jerk seasoning as i expected -- it could have used some extra heat.

additionally, although the pork chops had a nice pink smoky ring on the exterior (presumably from the bacon), portions of the bacon didn't get quite crispy enough.  i probably need to pre-cook some of the bacon...brown it up in the pan and wrap the chops when the bacon is halfway done.

would do again!